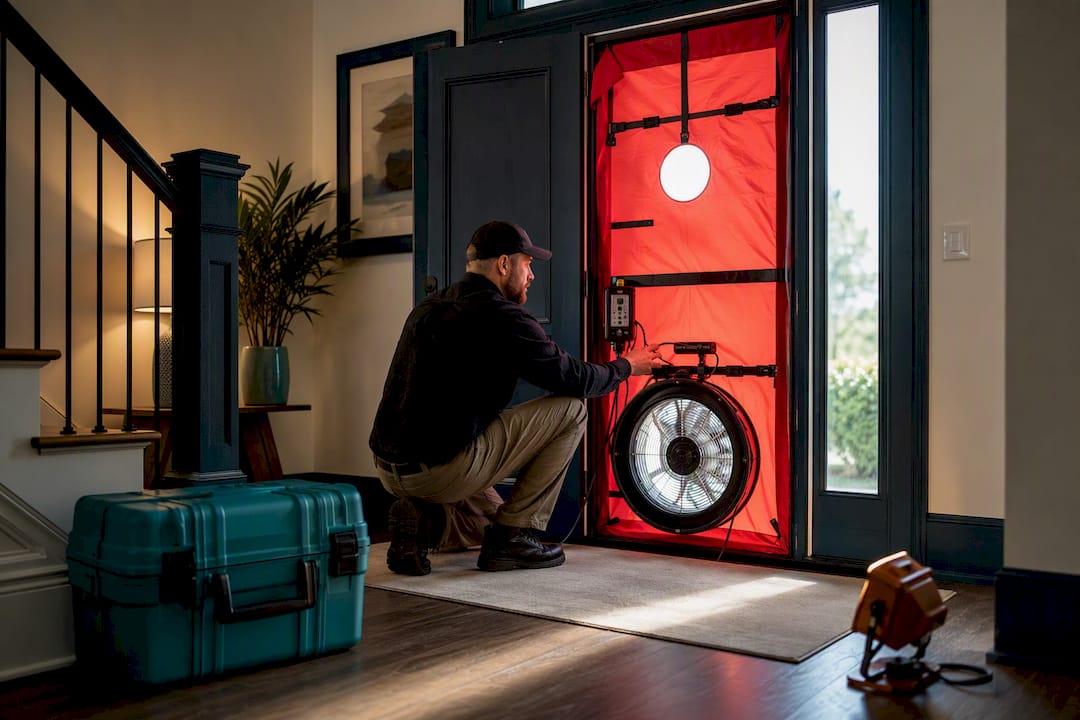
A blower door test measures how much air leaks through your home’s exterior envelope by depressurizing the building with a calibrated fan and recording airflow at a standard pressure, usually 50 pascals. The result comes back as CFM50 and ACH50, two numbers that tell you almost everything about energy loss, comfort, and whether your build meets code or certification targets. If you need a hard number or want to find where your house is bleeding air, schedule a test with a certified rater before you guess.
TL;DR:
- A blower door test measures airflow required to depressurize a home at 50 pascals, with CFM50 and ACH50 as the key metrics for leakage.
- Testing should be done before drywall installation and after construction completion to identify leak sources early and verify improvements.
- Sealing attic hatches, rim joists, top plates, and window perimeters offers the highest return on investment for reducing ACH50.
- Diagnostic tools like infrared cameras, smoke sticks, and duct pressure testing enhance leak detection and verification during sealing.
- Costs vary by region and scope, but retesting after sealing is essential to ensure all leaks are properly addressed for code and certification compliance.
Table of Contents
- How Does a Blower Door Test Work?
- CFM50, ACH50, and ELA: The Numbers That Actually Matter
- When Should You Schedule a Blower Door Test?
- What Equipment and Safety Checks Should You Expect?
- How Do You Read a Blower Door Test Report?
- Where Do Most Air Leaks Actually Hide?
- What Diagnostic Tools Pair With a Blower Door?
- What Does a Blower Door Test Cost, and What Happens After a Fail?
- Why Better Quality Builders Treats Airtightness as a Build Quality Metric
- Where to Verify Testing Standards and Procedures
- Sources
How Does a Blower Door Test Work?
The setup looks simple, but every piece of it exists to produce a repeatable, defensible number. A rater mounts an adjustable panel and calibrated fan into an exterior doorframe, seals the gaps around the frame, and connects a digital manometer that reads pressure differences between inside and outside the house.
Here’s how a typical test runs from start to finish:
- Building prep. The rater closes all windows and exterior doors, sets interior doors open (so the whole house acts as one zone), and shuts dampers on fireplaces and dryer vents.
- Fan installation. The blower door frame goes into a convenient exterior doorway, usually the front or back entry, and gets sealed tight against the jamb.
- Baseline reading. Before the fan even runs, the manometer records the natural pressure difference from wind and stack effect. This baseline gets subtracted from later readings.
- Depressurization. The fan spins up and pulls air out of the house, dropping interior pressure until it hits 50 Pa below outdoor pressure. This is the industry default because it is easier to control and generally safer than pressurizing, which can push combustion gases or insulation debris into living spaces.
- Flow recording. The manometer logs the CFM required to hold that 50 Pa pressure difference. That number is CFM50.
- Repeat or expand. For a single-point test, one reading at 50 Pa is enough. Multi-point testing takes readings across a range of pressures (typically 15 to 60 Pa) to calculate leakage coefficients that predict airflow at pressures other than 50 Pa.
Most residential testing uses depressurization because it is simpler to set up and matches the RESNET single-point protocol used for most energy ratings. Pressurization tests happen when the depressurization approach risks backdrafting a combustion appliance or when a diagnostician wants to compare both directions to spot check valves or one-way leakage paths. Wind gusts above roughly 5 to 10 mph, wide indoor-outdoor temperature swings, and open flues can all skew a reading, which is why a competent tester averages several readings and notes conditions on the report.
CFM50, ACH50, and ELA: The Numbers That Actually Matter
CFM50 is the raw airflow, in cubic feet per minute, the fan moves to hold the house at 50 Pa of pressure difference. It is a useful absolute number, but it does not tell you much on its own because a 5,000 square foot house will naturally need more airflow than a 1,200 square foot one to hit the same pressure.
That’s where ACH50 comes in. Air Changes per Hour at 50 Pa converts CFM50 into a size-independent rate using this formula:
ACH50 = (CFM50 × 60) ÷ building volume in cubic feet
A 2,000 square foot single-story home with 9 foot ceilings has roughly 18,000 cubic feet of volume. If that home tests at 900 CFM50, the math works out to 3.0 ACH50, meaning the entire volume of air in the house theoretically gets replaced three times an hour at that pressure.
The third figure worth knowing is Effective Leakage Area (ELA), which converts the same airflow data into an equivalent hole size, expressed in square inches, that would produce the same leakage. ELA is less commonly quoted on residential reports but shows up in scientific and research contexts because it isolates the physical size of the leakage path from the pressure used to measure it.
A few points worth committing to memory:
- CFM50 normalized per square foot of floor area is common for comparing homes of different sizes without doing a full ACH50 calculation.
- ASTM E1827 governs the orifice blower door methods themselves, specifying single-point, two-point, and multi-point procedures and the equations behind each.
- RESNET provides the procedural rulebook that energy raters follow for certification and code compliance testing, while ASTM standards supply the calculation rigor behind multi-point analysis.
Statistic Callout: Multi-point testing per Building America’s enclosure leakage guidance generates leakage coefficients (C and n values) that let a technician estimate airflow at pressures other than 50 Pa, and even approximate natural infiltration rates under normal weather conditions. Results also need correction for altitude and temperature to stay comparable across different job sites, since air density changes with both.
When Should You Schedule a Blower Door Test?
Timing changes what a test can actually accomplish. A test run mid-construction answers different questions than one run after the drywall goes up, and both differ from a diagnostic test run on an older home.
- Rough-in or pre-drywall testing happens after the envelope is sealed but before insulation and drywall cover the framing. This is the cheapest point to fix a leak because every gap is still exposed.
- Final or occupancy testing happens once the home is complete, often required for code compliance, ENERGY STAR certification, or a mortgage energy rating.
- Diagnostic or retrofit auditing happens on existing homes to establish a baseline before weatherization work, then again afterward to document improvement.
Mid-construction testing consistently produces better outcomes because sealing a rim joist or top plate gap before drywall takes minutes with a caulk gun; sealing the same gap after occupancy might mean cutting into finished walls. Acceptance thresholds vary by program and climate zone. Colder zones generally demand tighter envelopes because the pressure differential driving infiltration is larger for more of the year, while some warm climate code paths allow slightly looser targets. Whatever the program, keep a paper trail: record the date, test type, weather conditions, and equipment used so a retest can be compared against the same baseline later, a practice Fine Homebuilding’s testing guidance treats as essential for credible before-and-after numbers.
What Equipment and Safety Checks Should You Expect?
A trustworthy blower door test looks the same no matter who runs it. Knowing the checklist helps you evaluate whether the person testing your home is doing it right.
- Calibrated fan and adjustable door panel, sized to the doorway and rated for the expected airflow range.
- Digital manometer connected via hoses to read indoor/outdoor pressure difference and fan flow simultaneously.
- Carbon monoxide monitor, especially when combustion appliances (furnaces, water heaters, fireplaces) are present.
- Smoke sticks or a smoke pencil to visualize air movement at suspect locations.
- Infrared camera, optional but increasingly common, to spot temperature differentials that indicate air leakage or missing insulation.
When a home has fuel-burning appliances, a rater following RESNET protocol as outlined by the Building America Solution Center should run a Worst Case Depressurization test, which checks whether operating exhaust fans and closing doors could pull combustion gases back into the house. Before the fan even starts, the building needs windows and exterior doors closed, dampers shut, and any exhaust fans that aren’t part of the test turned off. Insist on a written report that includes CFM50, ACH50, equipment model and calibration date, weather conditions, and which protocol (single-point or multi-point) was used.
Pro Tip: Ask your rater for the raw CFM50 reading, not just the ACH50 result. ACH50 depends on your stated building volume, and if that number is wrong, so is your ACH50, even if the raw airflow measurement was perfect.
How Do You Read a Blower Door Test Report?
The two numbers to focus on are CFM50 and ACH50, but the report should also show the building volume and floor area used to calculate them, since errors in those inputs quietly distort the final score.
To calculate ACH50 yourself, take CFM50, multiply by 60 to convert to cubic feet per hour, then divide by your home’s conditioned volume in cubic feet. A house testing at 1,200 CFM50 with 24,000 cubic feet of volume comes out to 3.0 ACH50.
Benchmarks vary widely by program and vintage:
- Older, untested homes commonly exhibit high ACH50 values reflecting decades of unsealed penetrations and settling.
- Standard new construction built to modern energy codes often targets relatively low ACH50 values, with targets varying by climate zone.
- ENERGY STAR certified homes generally require tighter results, and Passive House projects push toward very low ACH50 benchmarks that demand careful air sealing at every framing stage.
Statistic Callout: Building America’s guidance notes that correcting CFM50 for altitude and temperature is necessary to keep ACH50 comparable across different sites, since air density shifts with both variables and can skew raw readings if left uncorrected.
Wind speed, the averaging window used during the test, and even which door the fan mounts in can nudge results enough to flip a borderline pass/fail, which is why Fine Homebuilding’s interpretation guide recommends documenting test conditions in detail for any before-and-after comparison. A blower door test measures envelope integrity, not duct leakage or room-by-room comfort, so a tight ACH50 score doesn’t guarantee your ductwork is sealed or that every room feels comfortable. Once you have a reliable ACH50, the number also feeds directly into ventilation sizing. Tighter homes need mechanical fresh air, sized per ASHRAE 62.2 guidance, because natural infiltration alone won’t supply enough air exchange. A ventilation-sizing partner resource walks through how HVAC contractors translate a low ACH50 into a whole-house ventilation plan, and understanding how energy loss happens in the first place makes those numbers easier to act on.
Where Do Most Air Leaks Actually Hide?
Not every gap contributes equally to your ACH50 score. A handful of locations consistently account for the majority of measurable leakage, and fixing those first gives you the best return per hour of labor.
- Attic access hatches and pull-down stairs. Rarely sealed at the factory; a foam-gasketed cover or weatherstripped hatch box closes this fast.
- Rim joists and sill plates. The band around the foundation perimeter is a chronic leak path; closed-cell spray foam or rigid foam with sealant at the edges works well.
- Top plates and wiring/plumbing penetrations. Every wire and pipe running through a top plate is a potential leak; one-part polyurethane foam seals these efficiently.
- Recessed lighting cans. Older non-IC-rated fixtures leak conditioned air directly into the attic; airtight LED retrofit trims or gasketed covers solve this.
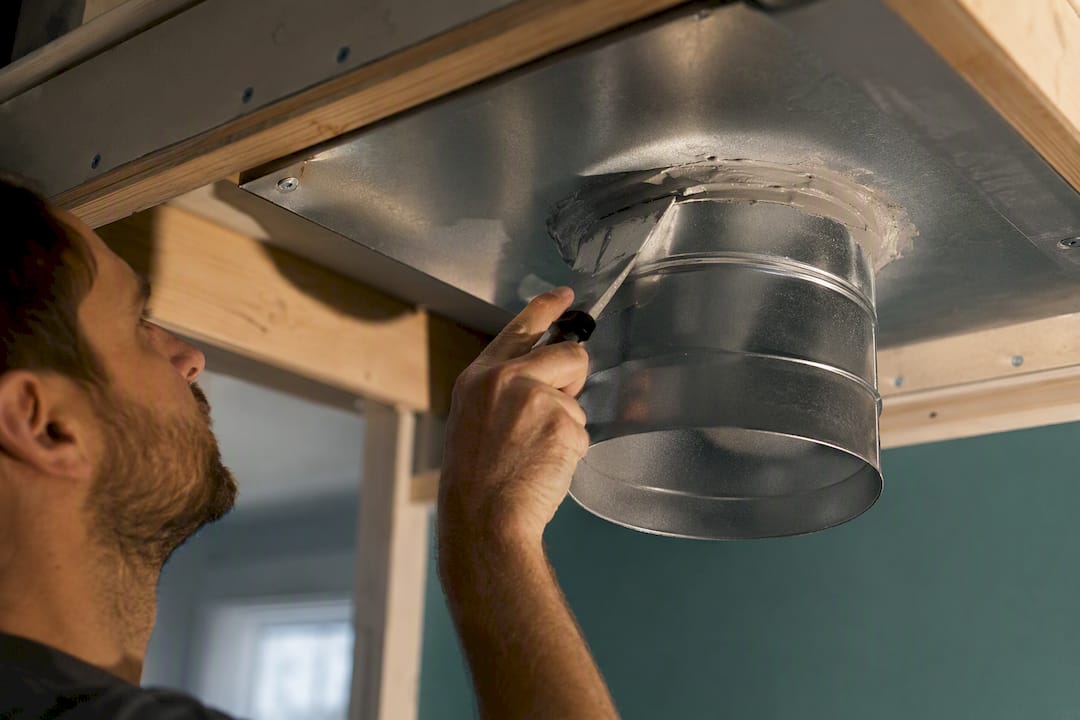
- Duct boots at ceiling and floor registers. The gap between the boot and the drywall or subfloor is almost always unsealed from the factory; mastic or foil tape closes it permanently.
- Window and door perimeters. Gaps between the frame and rough opening need low-expansion foam or backer rod and sealant, not just caulk on the trim.
- Electrical outlets and switch boxes on exterior walls. Foam gaskets behind the cover plate handle this cheaply.
Match the material to the gap: acoustic sealant for drywall-to-framing joints, spray foam for irregular three-dimensional gaps, flashing tape for anything exposed to moisture, and gaskets for anything you need to access again later. ENERGY STAR’s air sealing guidance lists these same priority zones for homeowners tackling sealing without a contractor.
Cost versus impact tends to favor attic-plane sealing first: attic hatches, top plates, and recessed lights are cheap fixes that often deliver the largest single-visit ACH50 drop, because attic bypasses drive stack-effect infiltration more than most wall penetrations. Rim joists come next, followed by window and door perimeter work, which costs more in labor per linear foot but matters most in older homes with worn weatherstripping. Practical guidance on door-related sealing options and window seal failure signs covers two of the most commonly missed leak categories in existing homes.
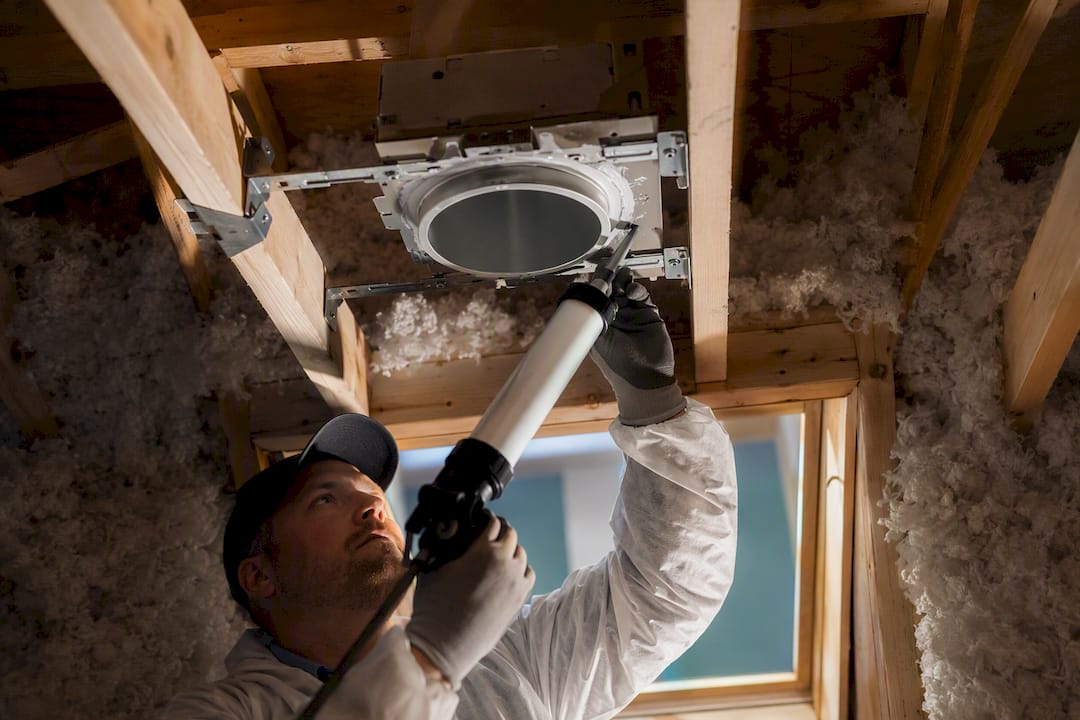
Pro Tip: After sealing, always retest with the same blower door protocol before calling the job done. A visual seal doesn’t guarantee airtightness. Only a fan running at 50 Pa proves it. Document the before-and-after ACH50 numbers for your own records or for a certification body that requires proof of improvement.
What Diagnostic Tools Pair With a Blower Door?
A raw CFM50 number tells you the house leaks. It doesn’t tell you where. That’s why the best audits run the blower door and a diagnostic tool at the same time rather than treating the test as a one-off number.
- Infrared thermography during depressurization highlights temperature differentials at wall penetrations, missing insulation, and framing gaps that are invisible to the naked eye.
- Smoke pencils or smoke sticks show air movement directly at suspect joints, letting a technician watch a leak in real time rather than infer one from a thermal pattern.
- Zonal pressure testing isolates leakage between specific zones, like an attic and the living space below it, by measuring pressure differences room to room while the main fan runs.
- Duct pressure-pan testing places a small pan over each supply and return register to measure duct-specific leakage separately from envelope leakage, since a blower door test alone can’t distinguish the two.
The most effective workflow, sometimes called blower-door-assisted sealing, runs the fan continuously while a second technician moves through the house sealing leaks as they’re found, then checks the manometer reading drop in real time to confirm the fix worked. This shortens the feedback loop dramatically compared to testing, writing a report, then scheduling a separate sealing visit weeks later. Building America’s enclosure leakage resource recommends this combined approach specifically because it turns a single number into an actionable repair map.
Pro Tip: If a zonal or pressure-pan test reveals duct leakage above roughly 6% of system airflow, bring in a licensed HVAC contractor. Duct sealing at plenum connections and boot penetrations often requires access and materials a general air-sealing crew won’t have on hand.
What Does a Blower Door Test Cost, and What Happens After a Fail?
Costs swing based on region, whether the tester holds a RESNET or BPI credential, and whether the visit bundles in a full energy audit with infrared scanning and combustion safety testing. A standalone single-point test costs less than a combined audit that includes diagnostics, duct testing, and a written improvement plan.
Plan for roughly one to two hours on site for setup, the test run itself, and a walkthrough of results, longer if the tester is also hunting leaks with smoke or infrared equipment. Scheduling around calm, mild weather reduces the wind and temperature variability that can distort a borderline reading.
If a test comes back above the target ACH50:
- Prioritize attic-plane sealing (hatches, top plates, recessed lights) first since it’s the cheapest fix with the biggest typical impact.
- Address rim joists and window/door perimeters next.
- Retest using the identical protocol and door location as the original test for a valid comparison.
- Keep the before-and-after report on file. It supports code sign-off, certification applications, and resale disclosures that increasingly ask for documented energy performance.
Why Better Quality Builders Treats Airtightness as a Build Quality Metric
Testing shouldn’t be a one-time hurdle you clear at the end of a project. The most reliable approach treats it as a checkpoint woven into the schedule: a pre-drywall test to catch framing gaps while they’re still cheap to fix, contractor diagnostics during the insulation phase, and a final verification test before handoff.
Better Quality Builders builds with AirLight steel-insulated panels precisely because panelized construction removes much of the guesswork that causes leaky stick-framed envelopes. Factory-formed panel joints leave far fewer random gaps than field-framed walls assembled from dozens of individual studs and plates, which is part of why homes built this way report up to 60% lower energy bills. A tighter envelope also changes how you design ventilation. Once infiltration drops, mechanical fresh air delivery becomes the primary way air actually moves through the house, which is worth planning for at the design stage rather than retrofitting later.
If you’re weighing airtightness performance as part of a new build, the AirLight panel system page walks through how the material performs, or you can look at available floor plans built around the same envelope approach from the start.
— David Kobierski
Where to Verify Testing Standards and Procedures
For the calculation methods behind single-point and multi-point testing, ASTM E1827 is the primary reference. For procedural detail auditors and raters follow during certification testing, RESNET’s protocols, summarized in the Building America Solution Center’s blower door resource, cover equipment setup and combustion safety checks. For diagnostic field techniques like infrared pairing and zonal testing, the Building America enclosure leakage guide offers the most field-tested approach. For homeowner-facing sealing priorities without the technical calculations, ENERGY STAR’s air sealing fact sheet remains the clearest starting point.
Sources
- Using a Blower-Door Test and Interpreting the Results - Fine Homebuilding
- E1827 Standard Test Methods for Determining Airtightness of Buildings Using an Orifice Blower Door
- Air Sealing fact sheet — ENERGY STAR / DOE