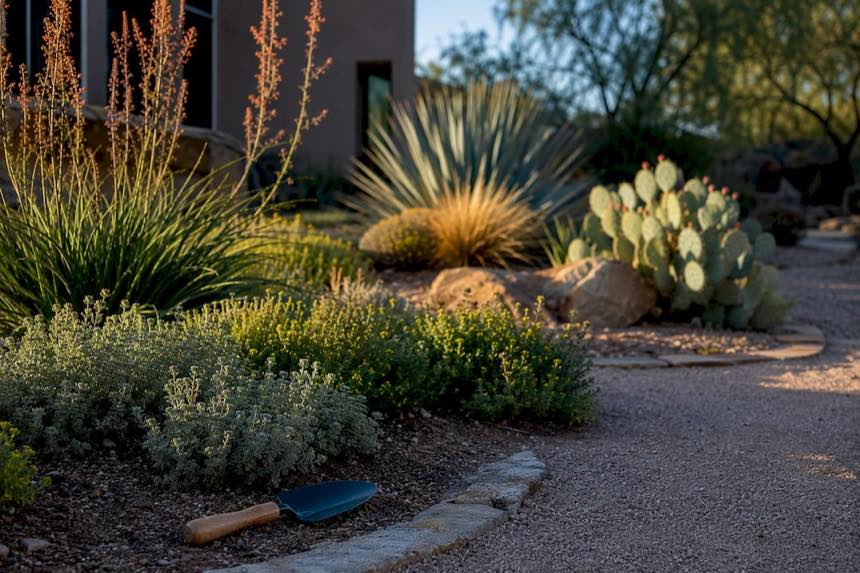
Desert landscaping xeriscape is a water-wise design method that groups plants by water need, relies on drought-adapted species and drip irrigation, and covers soil with mulch to cut outdoor water use dramatically. Outdoor watering makes up 50% or more of summer domestic water use in the desert Southwest, so the single best first move is mapping your yard into water-use zones before you buy a single plant.
TL;DR:
- Mapping water zones before planting helps target irrigation and reduces overall water use, especially in high-demand oasis areas.
- Native and adapted plants, placed according to zone and microclimate, outperform imports and minimize maintenance and water needs.
- Testing for caliche and choosing appropriate mulch types are essential to improve soil drainage and conserve moisture effectively.
- Drip irrigation with zone-specific timers and filters maximizes water efficiency by delivering moisture directly to root zones and reducing evaporation.
- Phasing turf removal and doing DIY planting lowers costs, while selecting native species and site-aware designs can significantly cut long-term water and energy expenses.
Table of Contents
- What Is Desert Landscaping Xeriscape and Where Do You Start?
- Which Desert Plants Work Best for Each Hydrozone?
- How Do You Handle Desert Soil, Caliche, and Mulch?
- What Irrigation Setup Actually Saves Water?
- When Should You Plant, and How Do You Get Roots Established?
- What Maintenance Should You Actually Expect?
- How Much Does Desert Landscaping Cost, and What Do You Save?
- How Xeriscape Fits Into Smarter Desert Home Planning
- Building a Xeriscape-Ready Home From the Ground Up
- Where to Find More Local Xeriscape Guidance
- Sources
- FAQ
What Is Desert Landscaping Xeriscape and Where Do You Start?
Xeriscape comes from the Greek “xeros,” meaning dry, and it was coined specifically for landscapes built around low water use rather than lush turf. The New Mexico State University Cooperative Extension frames it around seven core principles: planning and design, soil improvement, efficient irrigation, mulch, limited turf areas, water-efficient plants, and appropriate maintenance. Every section below builds on one or more of these.
Before anything else, walk your property with a notepad. Sun exposure, slope direction, and existing plants all change how water moves and pools across your yard.
Here’s a practical site-assessment sequence to follow:
- Map sun and shade patterns at three points in the day (morning, noon, late afternoon) since desert sun intensity varies sharply by exposure.
- Note slope and drainage direction so you know where runoff naturally collects during monsoon storms.
- Mark wind corridors, especially near block walls or two-story structures that funnel gusts.
- Inventory existing plants and hardscape worth keeping, including mature trees that already provide shade.
- Locate utility lines and call 811 or your local Blue Stake service before digging anything, since striking a buried line during excavation is a costly and dangerous mistake.
- Assign hydrozones: an “oasis” zone near patios and entries for higher-water plants, a “transition” zone with moderate water needs, and a “natural” zone farthest from the house that survives on rainfall alone. This oasis-to-natural gradient is a foundational xeriscape concept, letting you concentrate water where you’ll actually enjoy it.
Sketch this on graph paper or a simple app, then rank each zone by priority. A short planning checklist keeps you honest: identify the oasis zone first, minimize its square footage, place transition plants as a buffer, and leave the natural zone almost entirely to native species.
Which Desert Plants Work Best for Each Hydrozone?
Native plants evolved in your specific soil and rainfall pattern, so they generally outperform imports once established. Many desert natives are legumes, which improve soil nitrogen and tolerate temperature swings that would stress adapted or exotic species, according to University of Arizona Extension guidance. “Adapted” plants originate elsewhere but tolerate similar heat and drought, expanding your palette without sacrificing water efficiency.
Buy by botanical name, not common name. “Desert marigold” can refer to several species at a nursery counter, but Baileya multiradiata is always the same plant.
Organize your shopping list by role and zone:
- Shade trees for the oasis zone: Desert willow (Chilopsis linearis), palo verde (Parkinsonia species), and mesquite (Prosopis species) for larger yards.
- Structural shrubs for transition zones: Texas sage (Leucophyllum frutescens), brittlebush (Encelia farinosa), and desert spoon (Dasylirion wheeleri).
- Succulents and accents: Agave, ocotillo (Fouquieria splendens), and barrel cactus for low-water focal points.
- Groundcovers: Trailing lantana and damianita fill gaps without competing for water.
- Pollinator-friendly seasonal color: Penstemon, globe mallow, and desert marigold bring bloom cycles that support bees and hummingbirds.
Placement matters as much as species choice. Keep large agave and cholla away from walkways where spines pose a hazard, and plant trees at least 10 to 15 feet from foundations since root spread can eventually stress slab edges. Confirm cold tolerance for your specific elevation. A plant rated hardy in Phoenix may not survive a Flagstaff winter, so cross-check against a municipal plant list like AMWUA’s regional guide before committing to a design.
How Do You Handle Desert Soil, Caliche, and Mulch?
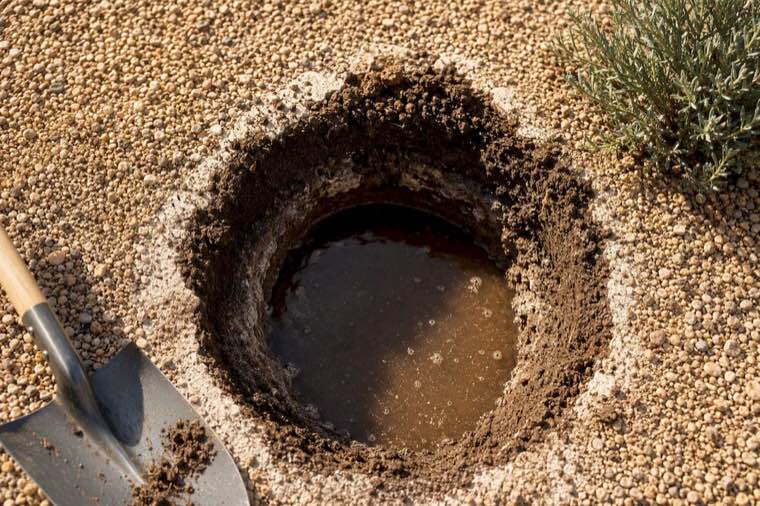
Desert soil rarely behaves like garden-center potting mix, and the biggest culprit is caliche, a cemented layer of calcium carbonate that blocks drainage and traps water around roots. Test for it before you plant: dig a hole roughly 18 inches deep, fill it with water, and watch what happens next.
- If the water drains within a few hours, your soil is workable as-is.
- If water still sits after 24 hours, you likely hit caliche or hardpan and need to intervene.
- The standard fix is digging a narrow vertical “chimney” through the caliche layer so water can percolate past it, a technique Extension researchers specifically recommend to prevent root rot in an otherwise well-chosen plant.
Mulch choice depends on which hydrozone you’re covering. Rock mulch (granite or decomposed basalt) suits natural and transition zones because it reflects heat and never breaks down, applied at roughly 2 to 3 inches deep. Organic mulch (bark, wood chips) works better in oasis zones with higher-water plants, applied 3 to 4 inches deep, since it retains moisture and slowly feeds the soil as it decomposes.
Resist the urge to till compost into every planting hole. True desert natives often perform worse in overly rich soil, since it encourages fast, weak growth instead of the slow, deep roots that make them drought-tough in the first place.
Pro Tip: Before planting any tree or large shrub, run the 24-hour drainage test in that exact hole, not a random spot nearby. Caliche depth can vary by several feet across a single yard.
What Irrigation Setup Actually Saves Water?
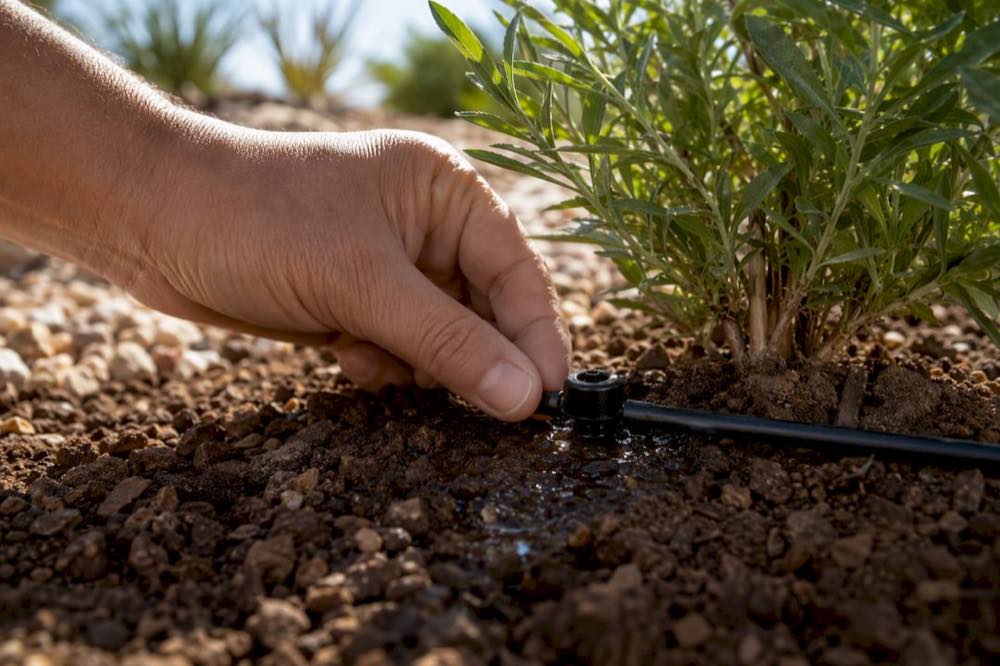
Drip irrigation is the backbone of an efficient xeriscape because it delivers water directly to the root zone at low volume, which encourages deep root growth while cutting evaporation losses that spray sprinklers waste into the air. Deep roots make plants more drought-resilient long after installation, which is the entire point of converting in the first place.
Design your system around the hydrozones you already mapped:
- Separate valves by zone. Oasis, transition, and natural zones need independent watering schedules, so each gets its own valve and controller program.
- Add pressure regulators and filters on any line longer than 100 feet, since municipal water pressure can blow out emitters without one.
- Place emitters at the plant’s drip line, not at the trunk, and size emitter flow to the plant’s mature root spread rather than its current size.
- Set seasonal timers. Summer oasis zones might run twice weekly at greater volume, transition zones once weekly, and natural zones only during extended dry spells after establishment.
- Check and flush filters monthly during the growing season to prevent clogged emitters from silently underwatering entire sections.
If your municipality allows it, a laundry-to-landscape graywater system or a simple rain barrel setup can offset potable water use for transition and oasis zones. Check local codes first, since graywater rules vary significantly by city and county across Arizona, Nevada, and California.
Pro Tip: Run your drip system manually for the first two weeks after installation and watch each emitter. It’s far easier to catch a clogged or misaligned emitter before a plant shows stress than after.
When Should You Plant, and How Do You Get Roots Established?
Late fall is the preferred planting window across much of the Arizona desert, because cooling soil and air temperatures let roots establish before summer heat arrives, unlike spring planting, where young roots barely settle in before triple-digit stress hits.
First-year watering needs differ sharply by plant type:
- New trees: Water deeply two to three times weekly for the first month, then taper to once weekly through the first summer.
- Shrubs: Similar frequency but shorter duration, tapering to twice monthly by year two.
- Succulents and cacti: Water sparingly even at installation. Overwatering young cactus root balls is a far more common killer than drought.
Stake young trees loosely for the first six months only, since permanent staking weakens trunk development. Skip aggressive pruning in year one. Let the plant establish canopy and root mass first. The most common installation mistake homeowners make is planting too deep, burying the root crown and inviting rot in soil that already drains poorly.
What Maintenance Should You Actually Expect?
“Low maintenance” is relative, not absolute. Extension guidance is direct about this: xeriscapes still need seasonal mulching, periodic deep watering, and regular pruning, just far less than a turf lawn demands.
- Spring: Refresh mulch depth, check drip emitters after winter, and prune winter-damaged growth.
- Summer: Monitor for heat stress, adjust irrigation timing for early morning, and watch oasis-zone plants closely during heat waves.
- Fall: Ideal planting window, plus a good time to divide overcrowded perennials.
- Winter: Minimal watering for established natives, occasional freeze protection for tender succulents.
Overwatering shows up as yellowing leaves and soft, mushy stems, while underwatering causes crisping leaf edges and premature leaf drop. When in doubt, check soil moisture two inches down before adding water. Seal gaps around block walls and foundation lines, since loose rock mulch and debris piles attract scorpions, and stacked firewood or rock borders near entries are common hiding spots. The real trade-offs are upfront cost and reduced turf area for anyone who wants a traditional lawn look, both of which phased conversion can soften over a few seasons.
How Much Does Desert Landscaping Cost, and What Do You Save?
Outdoor irrigation eats up 50% or more of summer household water use in desert Southwest homes, which is exactly the consumption a well-designed xeriscape targets first.
Costs scale with yard size and hardscape ambition. A small front-yard conversion (removing a modest turf patch, adding gravel and a handful of shrubs) often runs into the low thousands. A full backyard overhaul with trees, drip infrastructure, and boulder hardscape climbs considerably higher, especially if you bring in a contractor for grading and drainage work.
Check your municipal water provider’s website before starting. Many Arizona, Nevada, and Southern California utilities offer turf-removal rebates or free plant-list booklets that offset material costs. Phasing the project, converting 25 to 50% of your turf per year rather than all at once, spreads expense and lets you learn your new plant palette before scaling up. DIY installation of plants and mulch saves labor cost, while hiring a professional for drip system design and caliche remediation often pays for itself in fewer callbacks and dead plants.
How Xeriscape Fits Into Smarter Desert Home Planning
Water use and energy use are more connected than most homeowners realize. A yard designed around shade trees and reflective rock mulch reduces heat radiating onto exterior walls, which lowers cooling demand right alongside your water bill. Site-aware planning, thinking about sun angles, wind corridors, and plant placement before a single wall goes up, is the same discipline that makes a home efficient for decades. Pairing a well-planned xeriscape with a heat-smart floor plan gives a desert property real, compounding advantages. Work with a licensed landscaper or an integrated home-build planner whenever the project touches foundations, grading, or utility lines.
— David Kobierski
Building a Xeriscape-Ready Home From the Ground Up
If you’re planning a new build rather than retrofitting an existing yard, you can preview your xeriscape layout against your actual home design before construction begins. Our 3D lot rendering process lets you see how hydrozones, shade trees, and hardscape will sit against your home’s orientation, so you’re not guessing how afternoon sun hits your patio after the walls are already up.
Our AirLight steel panel homes already run up to 60% lower energy bills, and pairing that structure with a shade-smart, water-efficient landscape compounds the savings further. Many custom home plans can be tailored around your lot’s slope, sun exposure, and drainage, the exact variables this guide walks you through mapping. If you’re building in Maricopa County and want a site plan that treats your landscape and your home as one system, reach out through our custom home building page to schedule a consultation.
Where to Find More Local Xeriscape Guidance
For deeper plant lists and irrigation specs, consult NMSU’s Principles of Xeriscape, the University of Arizona Extension’s Xeriscape guide, and EPA WaterSense landscaping tips. Check your city water utility’s site for local rebate programs before you buy materials.
Sources
- Landscape Water Conservation: Principles of Xeriscape | New Mexico State University
- Xeriscape (University of Arizona Extension)
FAQ
How much does desert landscaping cost?
Costs vary widely by yard size and design, ranging from a few thousand dollars for a small turf-to-gravel front yard conversion to significantly more for a full backyard overhaul with trees, drip systems, and hardscape.
What are the disadvantages of xeriscaping?
The main drawbacks are upfront conversion cost, reduced traditional turf area for anyone wanting a classic lawn, and the reality that xeriscapes still require seasonal mulching, pruning, and monitored watering rather than zero upkeep.
What are the seven principles of xeriscaping?
The seven principles are planning and design, soil improvement, efficient irrigation, mulch, limited turf areas, water-efficient plant selection, and appropriate maintenance.
What is the cheapest way to xeriscape?
Phasing the project by converting 25 to 50% of your turf per year, doing your own planting and mulching, and choosing native plants that need no soil amendment keeps costs lowest while still cutting water use.
Is drip irrigation necessary for a desert xeriscape?
Drip irrigation isn’t strictly required, but it’s the most effective method because it delivers water directly to plant roots with minimal evaporation, building deeper and more drought-resilient roots than spray systems.