
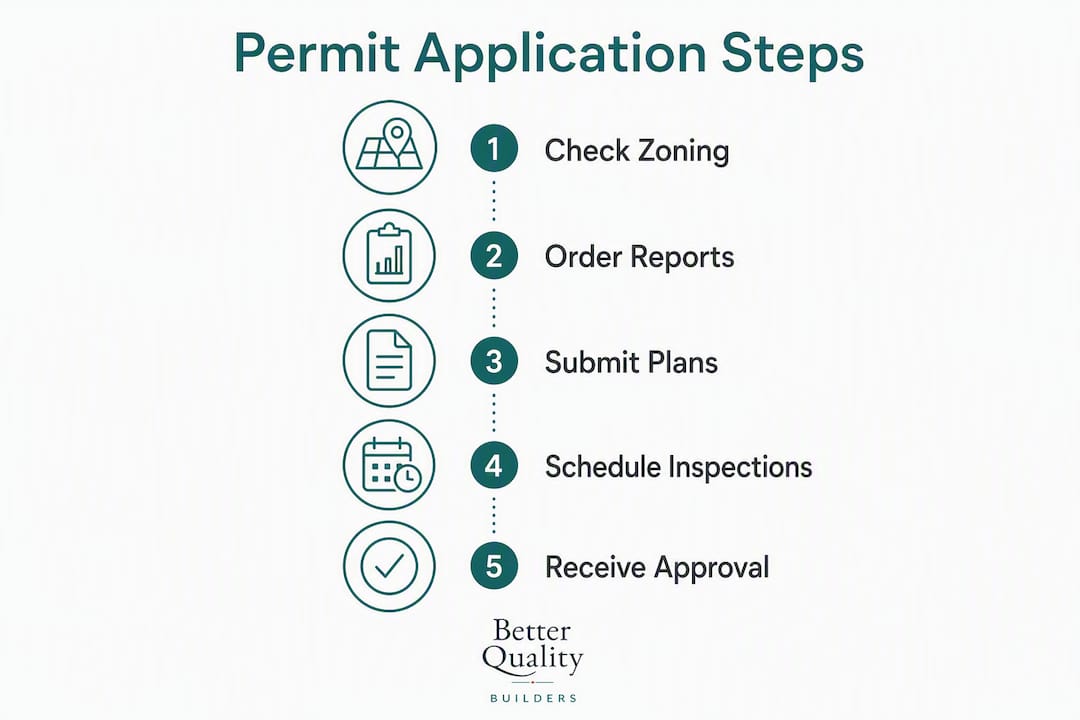
Start by confirming the permitting authority for your lot — city, county, or state — then follow a six-step path to an approved permit. That single first action prevents the most common and costly mistake in the custom home permits process: submitting documents to the wrong office and losing weeks before anyone tells you.
The six-step path looks like this:
- Jurisdiction check: Identify whether your lot falls under city, county, or state permitting authority.
- Pre-permit checks: Confirm zoning, easements, flood designation, HOA rules, and utility availability.
- Complete application: Assemble every required document before you submit a single page.
- Plan review response: Respond to reviewer comments quickly, in writing, with a change log.
- Inspections: Schedule and pass each milestone inspection from footing to final.
- Certificate of occupancy: Close out all sign-offs and receive your CO before moving in.
In high-demand jurisdictions — think California coastal counties and major metros — permitting alone can add 2–6 months to your project timeline. That figure assumes a clean, complete submittal. Incomplete packages reset the clock. The International Residential Code (IRC) and International Energy Conservation Code (IECC) set the national baseline, but your state and municipality layer their own amendments on top, so local rules always take precedence.
This week’s starting checklist:
- Locate your parcel ID or tax map number (find it on your county assessor’s website).
- Pull the zoning designation for your lot from the municipal zoning map.
- Check your property’s FEMA flood zone status at msc.fema.gov.
- Request a pre-submittal meeting with your local building department before ordering any reports.
Pro Tip: Request the pre-submittal meeting before purchasing a soils report or drainage study. Municipalities often have specific scoping requirements, and buying the wrong report wastes money you cannot recover.
Table of Contents
- Which permits does a custom home actually need?
- What pre-permit checks must you complete first?
- What goes on your permit application checklist?
- What happens after you submit your application?
- What does the inspection schedule look like?
- What will permits cost you?
- Who handles what during the permit process?
- What causes permit delays and how do you prevent them?
- How do you find your local building department and its forms?
- How Better Quality Builders handles permitting end-to-end
- Key Takeaways
- The permit surprise most builders never warn you about
- Ready to build a custom steel-panel home in Arizona?
- Useful sources for finding local permit requirements
Which permits does a custom home actually need?
A new single-family custom home rarely needs just one permit. Most projects require a stack of approvals from multiple agencies, and missing even one can halt construction mid-build.
Common permit types for new custom homes:
- Building permit — (covers structural, architectural, and energy compliance — the main plan-review permit)
- Floodplain development permit — (required when any portion of the lot sits in a FEMA Special Flood Hazard Area)
Jurisdictions split these responsibilities in ways that surprise first-time builders. A county building department typically issues permits for unincorporated areas outside city limits, while the city issues permits inside its boundaries. State agencies step in for septic systems, coastal development, and certain environmental programs. Fairfax County, Virginia, for example, handles new single-family residential building permits through its Land Development Services office, separate from utility connections and ROW approvals.
To confirm the right office fast, call or email the county assessor’s office with this exact question: “For parcel [tax ID], which office issues the building permit for new single-family construction?” That one question routes you to the correct agency without guessing.
What pre-permit checks must you complete first?
Submitting a permit application before completing site-level due diligence is the fastest way to receive a notice of incompleteness. These checks happen before you hire a designer or order a single report.
Zoning and use
Confirm your lot’s zoning designation and verify that a single-family residence is a permitted use. Pull setbacks (front, rear, side), maximum lot coverage, floor-area ratio (FAR), and any accessory-dwelling-unit rules. Check for overlay zones — historic districts, coastal zones, airport influence areas, and wildfire-urban-interface zones all add requirements that standard zoning maps do not show.

Site constraints
Order a title report and review it for easements and rights-of-way that restrict where you can build. Check topography: slopes above a certain grade often trigger geotechnical review requirements. Snohomish County’s residential checklist requires applicants to verify additional land-use permits — conditional use, shoreline, flood hazard — before a building permit application will be accepted. Wetlands, tree canopy protections, and critical-area buffers follow similar logic: confirm their presence or absence in writing before you design.
HOA and CC&R review
If your lot sits in a homeowners association, the HOA’s architectural review committee operates on its own timeline, completely separate from the municipal permit process. Submit HOA plans early. Many municipalities require written HOA approval as part of the permit application package, so a slow HOA review directly delays your permit.
Utility readiness
Obtain water and sewer availability letters from the utility provider. On rural lots, confirm well and wastewater permit requirements with the county health department. Verify fire-district access requirements — some districts require a hydrant within a specified distance and a minimum road width before they will approve a new home.
Drainage and access permits are frequent hidden costs on rural or hillside lots. Snohomish County differentiates drainage submittals by the area of new or replaced hard surface, with larger disturbances requiring a full Stormwater Pollution Prevention Plan (SWPPP). Verify these thresholds before purchasing raw land.
What goes on your permit application checklist?
A complete submittal is the single most effective way to reduce your total permitting timeline. Municipal portals perform a completeness review before initializing an application — incomplete packages are not initialized, and applicants receive a notice of incompleteness that resets the queue position.
Core documents every municipality expects
- Completed permit application form (signed by the owner or licensed contractor)
- Site/plot plan drawn to scale, showing property lines, setbacks, and existing features
- Floor plans for all levels
- Building elevations (all four sides)
- Foundation plan with footing details
- Structural plans and engineer-stamped calculations
- Soils/geotechnical report (required when site conditions warrant or the municipality mandates it)
- Energy compliance documentation: REScheck or a full IECC compliance report
- Mechanical, plumbing, and electrical drawings
- HVAC Manuals J, D, and S (load calculations, duct design, equipment selection)
Erie, Colorado’s custom-home submittal checklist includes site plan with contours, soils report, engineer-stamped foundation and structural plans, HVAC Manuals J/D/S, and HOA approval when applicable — a representative example of what most municipalities expect.
Special reports commonly required
- Drainage/stormwater packet (small-site plan or full SWPPP depending on disturbed area)
- Flood elevation certificate (required in FEMA Special Flood Hazard Areas)
- Septic design or sewer availability letter
- Fire protection narrative (for fire-district review)
- Arborist report (when protected trees are near the building footprint)
- Wetlands delineation (when critical areas are present)
Boston’s Building Permit Application Checklist illustrates how deep discipline-specific requirements can go: design professional stamps, energy code compliance letters, flood elevation certificates, and specialized narratives vary by project type and volume.
Administrative and contractor items
- Licensed contractor information (license number, insurance certificate)
- Design professional stamps and wet or digital signatures on all plan sheets
- Workers’ compensation affidavit or exemption certificate where required
- Fee payment receipt or payment authorization
- HOA architectural approval letter (when applicable)
Submittal organization tips
Name files using the municipality’s preferred convention (typically: ProjectAddress_Discipline_SheetNumber). Flatten all PDFs and embed fonts before uploading — some portals reject non-flattened files outright, while others accept them but flag them during completeness review, delaying initialization either way. If the jurisdiction still accepts physical plan sets, confirm the required number of copies before printing.
For resubmittals, cloud your revisions on the plan sheets and include a response memo that maps each reviewer comment to the specific sheet and detail number where the correction appears.
Pro Tip: Use the pre-submittal conference to get the agency’s exact document list in writing. Buying a geotechnical report before the municipality confirms it is required for your specific lot is a common and avoidable expense.
What happens after you submit your application?
Understanding the review workflow lets you anticipate delays and respond to comments before they compound into months of lost time. Here is the typical sequence:
- Submittal and completeness check. The intake coordinator reviews your package for completeness. Incomplete submittals are returned with a notice; complete packages are initialized and assigned a plan-check number.
- Plan-check fee payment. Fees are collected at initialization. Pay attention here: Berkeley, California notes that the code edition applied to your plan review is fixed on the date plan-check fees are paid, not the date of initial submittal. If a new code edition is about to take effect, timing your fee payment strategically can lock in the current edition.
- Technical review. Plans are routed to building, planning, fire, and public works reviewers simultaneously or sequentially depending on the jurisdiction. Each discipline checks compliance with its applicable codes.
- Consolidated comment letter. Reviewers issue a single comment letter (or discipline-specific letters) listing required corrections. Response time is yours to control.
- Resubmittal. Consolidate all corrections into one resubmittal when possible. Include a response memo that tracks every comment, the page where the correction appears, and the revision cloud number. Piecemeal resubmittals that address only some comments extend the cycle.
- Approval and permit issuance. Once all disciplines approve, the permit is issued. Pay the permit fee balance, receive your permit card, and post it at the job site before breaking ground.
Timeline variability is real. Permitting can add 2–6 months in high-demand markets, and that range assumes a clean first submittal. High-volume seasons, code adoption transitions, and understaffed plan-check departments all extend the queue. Phased submittals — submitting foundation plans for early review while architectural plans are still being finalized — can shorten the overall schedule in jurisdictions that allow them.
Pro Tip: Ask the plan-check coordinator for an estimated review date at initialization. Then follow up by email five business days before that date. A brief, professional check-in keeps your project visible without creating friction.
What does the inspection schedule look like?
Inspections are not optional milestones — they are legal prerequisites for the next phase of construction. Missing a required inspection or covering work before it is inspected can result in a stop-work order and mandatory destructive testing.
| Inspection Milestone | Typical Timing | Who Performs It |
|---|---|---|
| Footing/foundation | Before concrete pour | Municipal inspector |
| Under-slab rough-ins | Before slab pour | Municipal inspector |
| Framing rough | After framing, before insulation | Municipal inspector |
| Mechanical rough | After ductwork/equipment rough-in | Municipal or third-party |
| Electrical rough | After wiring, before drywall | Municipal inspector |
| Plumbing rough | After pipe rough-in, before cover | Municipal inspector |
| Insulation and air-sealing | After insulation, before drywall | Municipal or third-party |
| Mid-build energy | Varies by jurisdiction | Third-party HERS rater (often required) |
| Fire suppression test | Before final | Fire district or third-party |
| Final building inspection | After all trades complete | Municipal inspector |
| Certificate of occupancy | After final approval | Municipal building official |
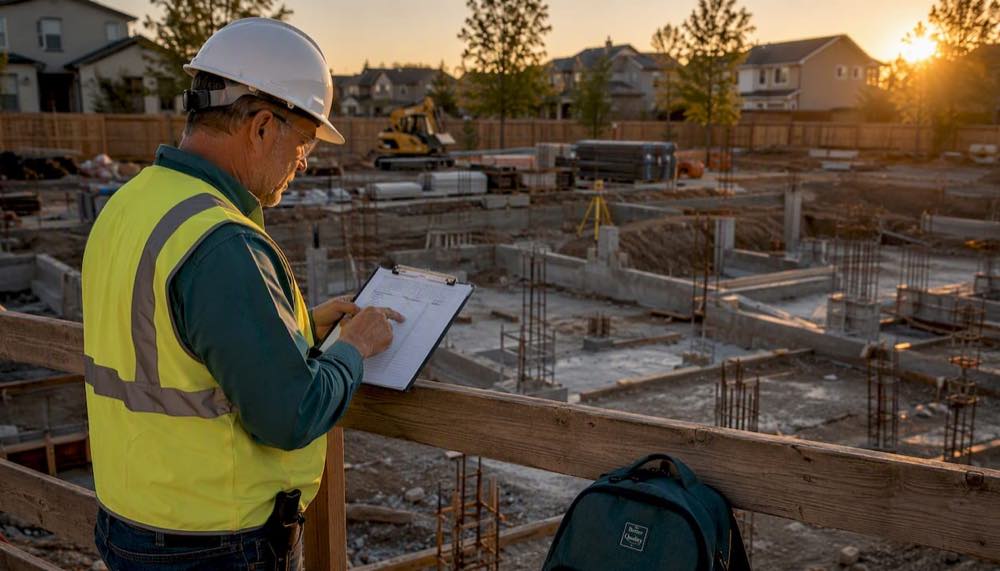
Some jurisdictions allow or require third-party or private inspectors for specific disciplines, particularly when municipal staff capacity is limited. Fire districts often conduct their own inspections independent of the building department. Confirm which inspections require municipal presence versus third-party sign-off at your pre-submittal meeting.
Scheduling lead times vary from same-day to five business days depending on the jurisdiction and season. Book each inspection as soon as the preceding phase is complete. If an inspection fails, document the correction in writing, photograph the repair, and request re-inspection promptly. A clear paper trail speeds re-inspection approval and protects you if questions arise later.
For a deeper look at what inspectors check at each phase, the inspection milestones guide from Better Quality Builders walks through what to expect at each stage.
Pro Tip: Keep a physical inspection log at the job site alongside your permit card. Record the date, inspector name, result, and any correction notes for every inspection. This log becomes part of your project closeout record.
What will permits cost you?
Permit fees vary widely by jurisdiction and project size, but the categories are consistent. Budget for all of them before you finalize your construction cost estimate.
Fee categories to expect:
- Building permit base fee: — Calculated by project valuation, per-square-foot rates, or a fixed schedule depending on the municipality. Erie, Colorado’s fee schedule is publicly posted online and shows how valuation-based formulas work in practice.
Set aside a contingency of 5–15% of your permittable construction cost to cover permit-related reports, third-party reviews, and fees that surface during the review process. Find your municipality’s fee schedule by searching “[city or county name] building permit fee schedule PDF” — most jurisdictions post these publicly. Read the fee table carefully: some fees are tiered by valuation band, and the threshold between bands can meaningfully change your total.
Who handles what during the permit process?
Permitting works best when every party knows their lane. Confusion about who files what, who signs what, and who follows up with the building department is a leading cause of delays that have nothing to do with the plans themselves.
| Role | Primary Permit Responsibilities |
|---|---|
| Owner | Final decision-maker; funds reports and fees; signs permit application when acting as owner-builder |
| Architect / Designer | Prepares construction documents, code narratives, and energy compliance; stamps and seals all plan sheets |
| Structural Engineer | Provides stamped structural calculations and foundation design; responds to structural plan-check comments |
| Civil Engineer | Prepares grading plan, drainage/stormwater packet, and erosion control plan |
| General Contractor | Coordinates submittal logistics, manages inspection scheduling, and serves as primary agency contact during construction |
| Permit Expeditor | Tracks application status, liaises with plan-check staff, and flags comment letters for rapid response |
The question of who appears as the official applicant on the permit matters. Owners who act as their own general contractor (owner-builder) can pull the permit themselves, but they assume full liability for code compliance and inspection sign-offs. A licensed general contractor as applicant shifts that liability and typically brings established relationships with local plan-check staff. For most custom-home projects, the general contractor as applicant is the lower-risk path.
When vetting design and construction professionals, ask directly: How many permits have you pulled in this jurisdiction in the last two years? What is your average plan-review cycle time here? Who signs and seals the structural documents? Understanding the role of an architect in your custom build helps you ask the right questions before signing a design contract. Hiring a licensed contractor with local permit experience reduces resubmittal cycles and keeps your project on schedule.
Pro Tip: Designate a single project contact for all municipal communications. When three different people email the plan-check coordinator with questions, responses slow down and the record becomes fragmented.
What causes permit delays and how do you prevent them?
Most permit delays are predictable and preventable. The root causes repeat across jurisdictions.
Top delay causes:
- Incomplete submittals: The single most common cause. A missing soils report or unsigned application form sends the package back to day one.
- Late third-party reports: Geotechnical and drainage reports have their own lead times. Order them as soon as the pre-submittal meeting confirms they are required.
- Jurisdiction backlog: High-volume seasons and understaffed departments extend queue times regardless of submittal quality.
- Unresolved zoning or entitlement issues: A variance, conditional-use permit, or HOA approval that is still pending blocks the building permit from being issued.
- Product approvals: Non-standard structural assemblies, fenestration products, or mechanical equipment sometimes require engineering sign-off or ICC evaluation reports before plan reviewers will accept them.
- Code adoption transitions: When a municipality adopts a new code edition mid-project, plans submitted under the old edition may need to be updated.
Prevention checklist:
- Hold a pre-submittal meeting and get the required document list in writing.
- Order geotechnical and drainage reports immediately after the pre-submittal meeting confirms they are needed.
- Resolve all zoning, entitlement, and HOA approvals before submitting the building permit application.
- Confirm product approval status for any non-standard assemblies before the structural engineer finalizes the plans.
- Use a permit expeditor for jurisdictions with known backlogs or complex multi-agency review processes.
- Maintain a resubmittal schedule: set an internal deadline for responding to comment letters within 10 business days.
For communication, keep every exchange with the building department in writing — email and portal messages create an audit trail that protects you if a dispute arises. A concise change log attached to each resubmittal shows reviewers exactly what changed and where, which shortens their second-review time. You can find more detail on the permit process for renovation and new construction to understand what reviewers typically flag.
Pro Tip: When you receive a comment letter, read it in full before responding to any single item. Some comments are linked — correcting one without addressing the related comment triggers a third review round.
How do you find your local building department and its forms?
The fastest path to the right forms is a targeted search, not a general web browse.
Use these search queries to find what you need:
- “[county name] residential building permit submittal checklist PDF”
- “[city name] building permit portal”
- “[county name] parcel tax ID lookup”
- “[county name] fee schedule building permits”
- “[city name] FEMA flood map” (or go directly to msc.fema.gov and enter your address)
On the municipal page, look for: the permit application checklist, plan-review timeline estimates, a contact list with the plan-check lead and intake coordinator’s email, and the fee-schedule PDF. Clark County, Washington’s residential building permit application packet is a good example of a well-organized public checklist that shows the level of detail most counties provide. Portland, Oregon’s new single-family residence page offers a pre-application conference option and lists all required forms in one place.
Save your portal login credentials immediately after creating an account. Before uploading, flatten your PDFs, embed all fonts, and name files using the municipality’s preferred convention. A package rejected at upload for a formatting issue costs you a day or more before you can resubmit.
How Better Quality Builders handles permitting end-to-end
Experienced builders do not treat permitting as an afterthought. At Better Quality Builders, the permit process starts at lot intake, not at design completion.
The workflow follows a clear sequence: lot intake and zoning verification, pre-design feasibility check (setbacks, FAR, flood zone, utility availability), coordination of geotechnical and drainage reports, preparation of stamped construction documents, filing with the authority having jurisdiction, active management of plan-review comment responses, inspection scheduling at each milestone, and final CO closeout.
AirLight steel panel systems affect plan documentation in specific ways. Energy compliance calculations reflect the panel’s thermal performance, which typically exceeds standard IRC prescriptive requirements and simplifies IECC compliance documentation. Structural assembly details for AirLight panels are prepared with engineer-stamped calculations that address the panel system’s load-path characteristics — reviewers in jurisdictions unfamiliar with steel panel construction sometimes require additional narrative, and Better Quality Builders prepares that documentation proactively.
Before submitting, the internal checklist confirms: all plan sheets are stamped and signed, the soils report references the specific lot, the drainage packet matches the grading plan, HOA approval is in hand, fee payment is authorized, and the submittal package is formatted to the portal’s specifications. That level of preparation is what keeps resubmittal cycles short and cost forecasting accurate for clients.
Key Takeaways
Confirming the correct permitting authority before submitting any documents is the single action that prevents the most common and costly delay in the custom home permits process.
| Point | Details |
|---|---|
| Confirm jurisdiction first | Identify whether your lot is permitted by the city, county, or a state agency before ordering any reports. |
| Complete submittal wins | Incomplete packages are returned to day one; use a pre-submittal meeting to get the required document list in writing. |
| Timeline buffer of 2–6 months | High-demand jurisdictions commonly add 2–6 months to a project schedule; plan for it from the start. |
| Assign one project contact | A single point of contact for all municipal communications reduces response delays and keeps the record clean. |
| Better Quality Builders | Handles permitting end-to-end for AirLight steel panel homes in Arizona, from lot intake and zoning check through CO closeout. |
The permit surprise most builders never warn you about
Most articles on this topic focus on documents and timelines. What they understate is how much the sequence of decisions matters.
The most common permitting surprise is discovering a site constraint — a drainage easement, a critical-area buffer, a fire-district access requirement — after the design is already 80% complete. At that point, redesigning to accommodate the constraint costs far more than it would have if the constraint had been identified at lot intake. The pre-submittal meeting is the tool that surfaces these issues early, but many owners and even some builders skip it because it feels like an extra step. It is not. It is the step that makes every subsequent step cheaper.
There is also a subtler issue with resubmittals that most guides miss. When you respond to plan-review comments, the format of your response matters as much as the technical content. A response memo that maps each comment to a specific sheet number and revision cloud lets the reviewer confirm your correction in two minutes. A response that simply says “revised per comment” sends the reviewer back to hunt through the plans, which slows the second-review cycle and occasionally results in a comment being marked unresolved even when the correction is there. Clean documentation is not bureaucratic box-checking. It is the fastest path through the review queue.
Ready to build a custom steel-panel home in Arizona?
Permitting a custom home built with AirLight steel panels is different from permitting a standard wood-frame build. The energy compliance documentation reflects the panel’s thermal performance, the structural calculations address the panel system’s load path, and reviewers unfamiliar with steel panel construction sometimes need additional narrative to approve the assembly. Better Quality Builders prepares all of that documentation as part of the build process — document prep, local plan-review liaison, inspection scheduling, and CO closeout are included, not add-ons.
Before reaching out, gather your lot’s parcel ID, any preliminary site plan or survey, HOA documents if applicable, a preferred floor plan from the Better Quality Builders library, and your financing status. That information lets the team run a permit-readiness review for your specific lot and give you a realistic timeline and cost forecast before you commit to a design.
Request a permit-readiness review for your Arizona lot, or explore the AirLight steel panel home options to see how the panel system affects plan documentation and energy-code compliance on your project.
Useful sources for finding local permit requirements
The most reliable permit information comes from the issuing authority itself. Use these sources as your starting point.
Municipal submittal checklists and portals:
- Clark County, WA — Residential Building Permit Application Packet: A fillable checklist covering required documents, signatures, and submittal instructions.
- Fairfax County, VA — New Building Residential Permits: Lists permit types, required documents, and the online application portal.
- City of Portland — New Single-Family Residence Permits: Includes pre-application conference options and a full required-forms list.
- Snohomish County, WA — Residential Building Permit Submittal Checklist: Shows drainage thresholds, land-use permit cross-checks, and access permit requirements.
- City of Boston — Building Permit Application Checklist: Illustrates discipline-specific document depth for larger jurisdictions.
- Erie, CO — Custom Homes and Fee Schedules: Shows portal-based submittal workflow and links to the published fee schedule.
Model codes and state amendments:
| Code | What It Covers | Where to Find Local Amendments |
|---|---|---|
| International Residential Code (IRC) | Structural, fire, energy, and mechanical requirements for one- and two-family dwellings | Your state’s building code office website |
| International Energy Conservation Code (IECC) | Energy efficiency requirements for new residential construction | State energy office or building department |
| State amendments | Local modifications to IRC/IECC (e.g., California Title 24, Florida hurricane provisions) | State legislature or building code council website |
Model codes like the IRC and IECC set the national baseline, but many states and municipalities add local amendments that materially change energy or structural requirements. California’s Title 24 and Florida’s hurricane provisions are well-known examples. Always verify the specific code edition and local amendments in effect for your jurisdiction before finalizing your construction documents.
Search queries to find your local portal fast: