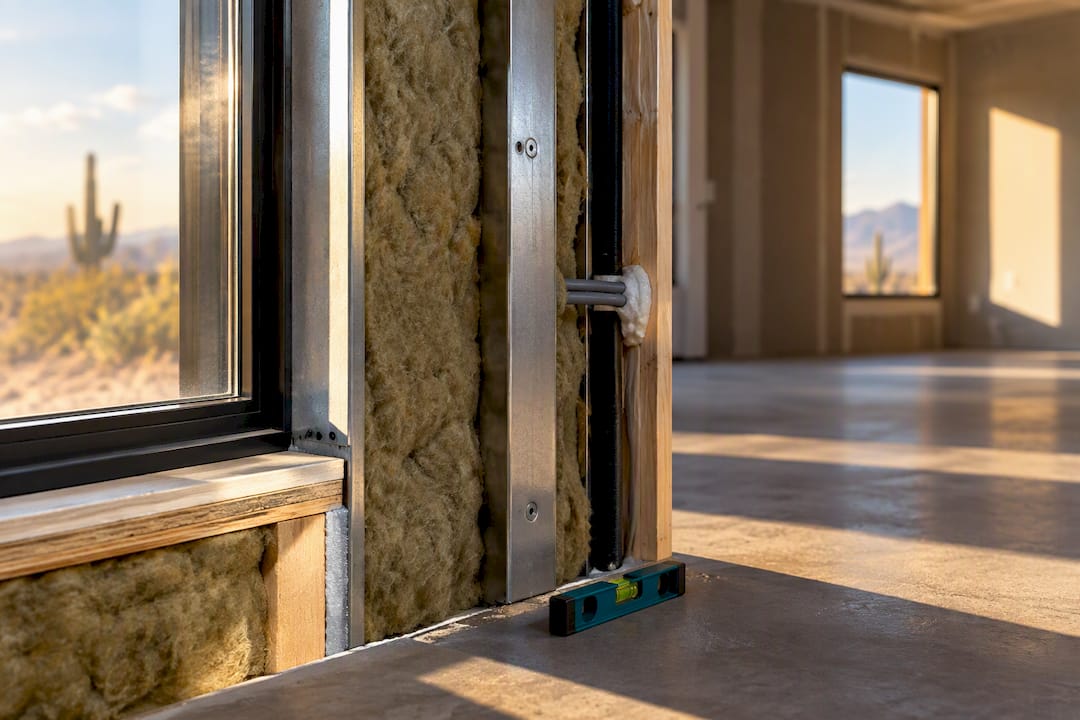
The most effective way to quiet an Arizona home combines airtight sealing, targeted mass, decoupling where budgets allow, and window or door upgrades matched to your climate needs. Start this weekend: walk your home’s perimeter, seal every visible gap with acoustical caulk, and test the difference with doors and windows closed. From there, the budgeted retrofit plans below show you exactly what to tackle next.
TL;DR:
- Sealing all gaps, especially around outlets, baseboards, and window frames, significantly reduces sound flanking paths and is the most cost-effective upgrade under $200.
- Adding mineral wool insulation, mass-loaded vinyl, and decoupling elements like isolation clips can achieve an STC 50 rating, blocking loud speech and music effectively.
- Upgrading windows to laminated glass or installing storm panels provides notable sound and energy savings, with storm windows offering a combined 10-21% reduction in heating and cooling costs.
- Retrofit costs for a 120-square-foot wall range from $140 for basic insulation to over $1,000 for full decoupling and mass, with professional labor advised for complex modifications.
- Incorporating acoustic design during home construction yields larger, cheaper, and more reliable soundproofing gains than retrofitting existing structures.
Table of Contents
- How soundproofing actually works in your home
- Element-by-element fixes for windows, walls, and more
- Retrofit plans by budget: what to build and what to expect
- Mistakes that quietly ruin your soundproofing project
- Permits, codes, and knowing when to call a professional
- Why the way a home is built changes how much soundproofing it needs
- Building for Arizona’s heat without sacrificing quiet
- Solving the noise problems Arizona homes actually have
- Why acoustic planning belongs in the blueprint, not the punch list
- How Better Quality Builders makes a quiet home the default, not the upgrade
- Sources
- FAQ
How soundproofing actually works in your home
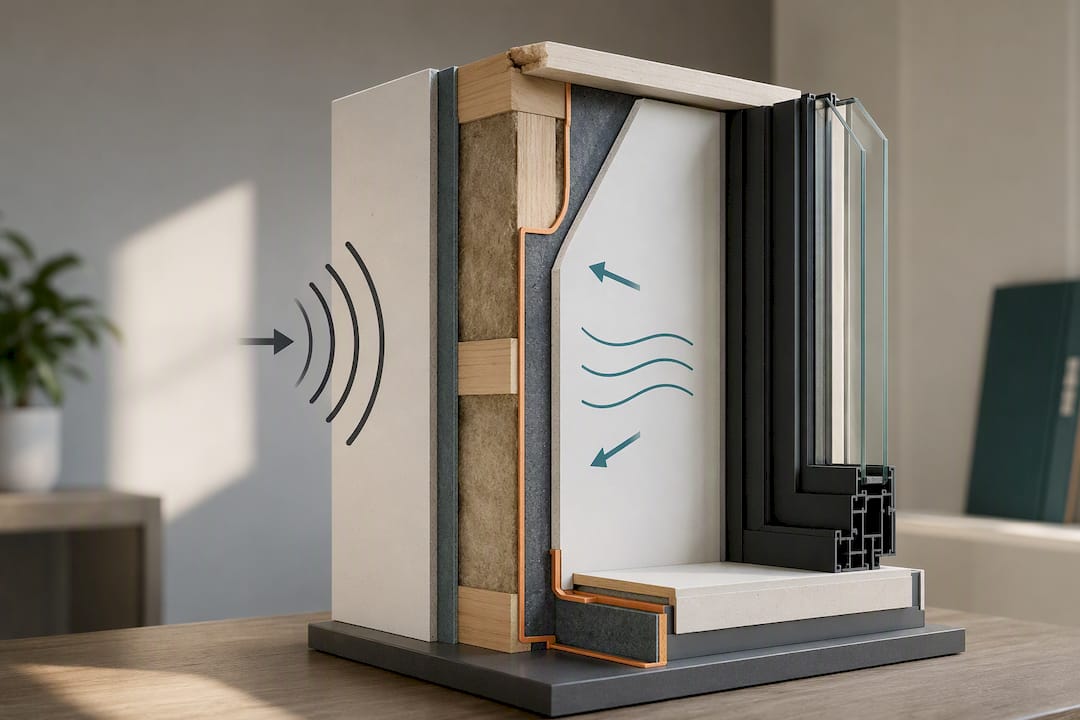
Four principles control how much sound moves through your walls, and understanding them saves you from wasting money on the wrong fix. Mass blocks sound by adding weight and density to a barrier: a heavier wall simply passes less sound energy through it. Damping converts vibration into small amounts of heat, which is why products like Green Glue compound work between layers of drywall. Decoupling breaks the physical connection between two sides of an assembly, so vibration cannot travel directly from one surface to the other. Absorption soaks up sound energy inside a room, reducing echo and reverberation rather than stopping transmission to the next room.
Homeowners often confuse absorption with blocking, and it is the single most common and costly mistake in DIY soundproofing. Acoustic foam panels absorb sound reflections inside a room, which helps with echo and recording quality, but they do almost nothing to stop noise from a neighbor’s yard or a busy street. The Whole Building Design Guide is direct about this: effective soundproofing requires mass, damping, decoupling, and absorption working together, and foam alone will not block sound transmission between rooms.
Sound Transmission Class, or STC, measures how well a wall, door, or window assembly blocks airborne sound. Higher numbers mean better blocking, and the practical differences matter:
- STC 33 is a typical single-layer interior wall: normal speech is audible and often understandable through it, according to wall assembly testing.
- STC 45 blocks most normal speech, though loud voices and bass-heavy music still come through.
- STC 55 and above blocks loud speech and most music, the range you want for a home theater wall or a shared wall with a noisy neighbor.
Even a well-built assembly fails if you ignore the weakest link. Sound follows the path of least resistance, called flanking, and it travels through electrical outlets, unsealed baseboards, HVAC ducts, and gaps around window frames just as easily as through a thin wall. USG’s sound performance guidance notes that soundproofing assemblies fail when perimeter joints and penetrations go unsealed, no matter how good the wall itself is. A $30 tube of acoustical sealant applied correctly can matter more than an expensive insulation upgrade applied around uncovered gaps.
Element-by-element fixes for windows, walls, and more
Different parts of your home’s envelope need different treatments, and Arizona’s heat adds a layer most soundproofing guides skip entirely. Here is how to approach each element without working against your energy bill.
- Windows. Low-E storm panels installed over your existing single-pane windows are often the most cost-effective fix, cutting both noise and energy loss. DOE case studies found retrofit storm windows delivered 10-21% heating and cooling savings along with reduced air leakage, and that combination of energy and noise benefit makes them worth prioritizing before a full replacement. If you are replacing windows outright, laminated glass adds meaningful STC improvement over standard double-pane units because the interlayer dampens vibration. Whatever route you choose, pay attention to SHGC ratings for Arizona heat alongside acoustic performance, since a window chosen for sound alone can backfire on your cooling costs. For a ground-level look at pricing before you call anyone, this window replacement checklist breaks down typical cost ranges homeowners run into.
- Doors. A hollow-core interior door is one of the weakest points in most homes. Swapping to a solid-core door, adding compression weatherstripping around the frame, and installing an automatic door sweep at the threshold closes the gaps that let sound (and desert dust) through.
- Walls. Cavity insulation is your foundation. Mineral wool batts outperform fiberglass for sound absorption at low frequencies and resist moisture and fire better, which makes them the standard recommendation for acoustic wall retrofits. Add resilient channel or, for better results, isolation clips with hat channel to decouple the drywall from the studs. Layer in mass-loaded vinyl (MLV) and a second layer of drywall with a damping compound between layers, and you move from an STC in the low 30s toward the 50s.
- Floors and ceilings. Impact noise from footsteps travels through joists more than through air. Soft flooring finishes, resilient underlayment, and joist isolation hangers cut down on that transfer, especially useful for two-story homes or rooms above a garage.
- HVAC and vents. Ductwork carries sound between rooms just like a hallway carries voices. Flexible duct loops absorb some vibration, register baffles reduce noise at the vent opening, and sealing return air paths stops sound (and conditioned air) from leaking where you do not want it.
Pro Tip: Before buying materials, seal every outlet box, switch plate, and baseboard gap in the room. It is the cheapest step and the one most people skip.
Arizona’s dry heat changes which materials make sense. Dense-pack cellulose and some foam insulation types can trap moisture in unexpected ways during monsoon humidity swings, so mineral wool’s moisture resistance is a real advantage here, not just a marketing point. Keep energy performance and acoustic performance on the same checklist: a window or wall upgrade that blocks noise but raises your cooling load is not a win.
Retrofit plans by budget: what to build and what to expect
You do not need a full renovation to hear a difference. These three tiers give you a starting material list, a realistic STC expectation, and a cost range so you can plan before you buy anything.
Budget tier: perimeter sealing and simple upgrades. Seal every gap around outlets, baseboards, and window and door frames with acoustical caulk. Add weatherstripping to doors, felt gaskets behind outlet covers, and heavy curtains or area rugs to soften hard surfaces. This tier does not fundamentally change your wall’s STC rating, but it closes the flanking paths that leak the most sound, and it typically costs under $200 in materials for a single room.
Mid-range tier: cavity insulation and selective decoupling. Open one side of the wall, add mineral wool batts in the cavity, and install resilient channel before rehanging drywall on that side. Replace the room’s worst-offending window with a laminated or low-E storm panel option. A 120-square-foot bedroom wall retrofit using this approach runs roughly $140 for basic insulation alone up toward several hundred dollars once you add resilient channel and labor.
High-performance tier: full decoupling and mass. Use isolation clips and hat channel instead of resilient channel, add mass-loaded vinyl, apply a damping compound between two layers of drywall, and replace windows entirely with laminated glass units. This combination targets STC 50 or higher, the range needed to seriously dampen loud speech and music. Material and labor costs for the same 120-square-foot wall reach $850 to $1,000 for the maximum method, with specialist labor adding another $2 to $5 per square foot.
Isolation clip systems outperform resilient channel for low-frequency sound in field testing, according to material performance research, and they are also less prone to being short-circuited during installation, a common failure mode with resilient channel that shares more information with the studs than intended.
Most sealing, weatherstripping, and even basic insulation work is well within reach for a handy homeowner. Hire a professional for anything involving electrical rework near outlet boxes, HVAC modifications, or installing decoupling hardware like isolation clips, where a small installation error erases most of the acoustic benefit. When vetting a contractor, ask for sample STC ratings on assemblies similar to yours and photos from past jobs showing sealant applied at every penetration, not just insulation stuffed into open cavities.
Mistakes that quietly ruin your soundproofing project
Most soundproofing failures trace back to a handful of repeatable errors, and catching them before drywall goes up saves you from redoing the work.
- Shorting resilient channel: Screws driven through the channel into the stud behind it defeat the entire decoupling effect, since vibration travels straight through the screw.
- Compressing insulation batts: Cramming mineral wool into a cavity too tightly reduces its air pockets and lowers absorption performance.
- Skipping perimeter seals: An unsealed gap where drywall meets the floor or ceiling can undo a wall assembly that otherwise tests well, echoing the USG guidance on perimeter sealing.
- Ignoring electrical boxes: Back-to-back outlets on shared walls create a direct air path between rooms unless you use putty pads or offset the boxes.
- Forgetting ductwork: A sealed wall next to an open HVAC return still leaks sound through the duct run.
Before you call anything finished, run a simple test. Have someone speak at normal volume on one side of the wall while you listen on the other, both before and after your upgrade, and note the difference in intelligibility rather than just loudness. A free smartphone decibel app will not give you lab-accurate numbers, but it is useful for comparing before-and-after readings in the same spot. If you need documented results, for a home theater or a rental unit where you must prove compliance, hire an acoustician for formal testing with calibrated equipment.
Permits, codes, and knowing when to call a professional
Most simple acoustic upgrades, sealing, weatherstripping, adding curtains, or installing cavity insulation in an existing wall without altering framing, do not require a permit in most Arizona jurisdictions. That changes once you touch structural elements. Removing or modifying load-bearing walls, changing window openings in a way that affects egress requirements, or altering framing typically triggers a permit review with your local building department. Rules vary by city and county, so check with your municipality before starting structural work, and if you live in an HOA community, review your architectural guidelines too, since exterior changes like storm windows or added trim can require separate approval even when the county does not require a permit.
When you do bring in a contractor, ask direct questions before signing anything:
- Request sample STC data for the specific assembly they plan to install, not a generic industry number.
- Ask to see installation photos from recent jobs showing sealed penetrations, not just insulation in open cavities.
- Confirm the sequencing plan: airtightness and acoustic sealing should happen before drywall closes the wall, not as an afterthought.
Pro Tip: If a contractor cannot explain the difference between absorption and blocking, keep looking. It is a basic distinction any qualified acoustic installer should know cold.
Call a licensed acoustical engineer rather than a general contractor when you need documented STC compliance for a rental property, a home business, or a shared-wall dispute. For a standard bedroom or home office upgrade, an experienced insulation or drywall specialist familiar with acoustic assemblies is usually enough.
Why the way a home is built changes how much soundproofing it needs
The quietest homes are not the ones with the most soundproofing added after the fact. They are the ones built airtight from the start. Some builders construct with panelized steel assemblies that create tighter, more consistent seals at every joint than traditional stick-frame construction, which can reduce the flanking paths that undermine many retrofit projects.
That airtightness is also what drives the energy performance behind the brand’s claim of up to 60% lower energy bills. The same seal quality that stops conditioned air from leaking out also happens to stop a meaningful share of outside noise from getting in, so acoustic performance and energy performance improve together rather than trading off against each other, which is the tension homeowners run into constantly when retrofitting an older home.
David Kobierski covers construction methods, energy performance, and building science topics for the Better Quality Builders blog, with a focus on how Arizona’s climate shapes practical building decisions. Readers looking for related guidance can find his work alongside other construction and design articles covering topics from window selection to airtight detailing.
Building for Arizona’s heat without sacrificing quiet
Arizona’s climate creates a specific tension: the sealing and insulation techniques that block sound also affect how a home manages heat, and getting one wrong can undercut the other. Mineral wool batts, the standard recommendation for acoustic cavity insulation, hold up well in Arizona’s dry conditions because they resist moisture problems that can develop during monsoon season humidity spikes, unlike some foam insulation types that can trap moisture in unexpected ways.
Window choices need the same dual consideration. A low-E storm panel added over an existing window cuts noise and, according to DOE field studies, delivers real energy savings from reduced air leakage, which matters more in Arizona than almost anywhere else given how hard air conditioning systems work through the summer months. If you are choosing between soundproofing materials, favor options that also improve your home’s air sealing rather than treating the two goals as separate projects. Dense, well-sealed assemblies block sound and slow heat transfer through the same mechanism: less air movement through the wall or window opening.
Solving the noise problems Arizona homes actually have
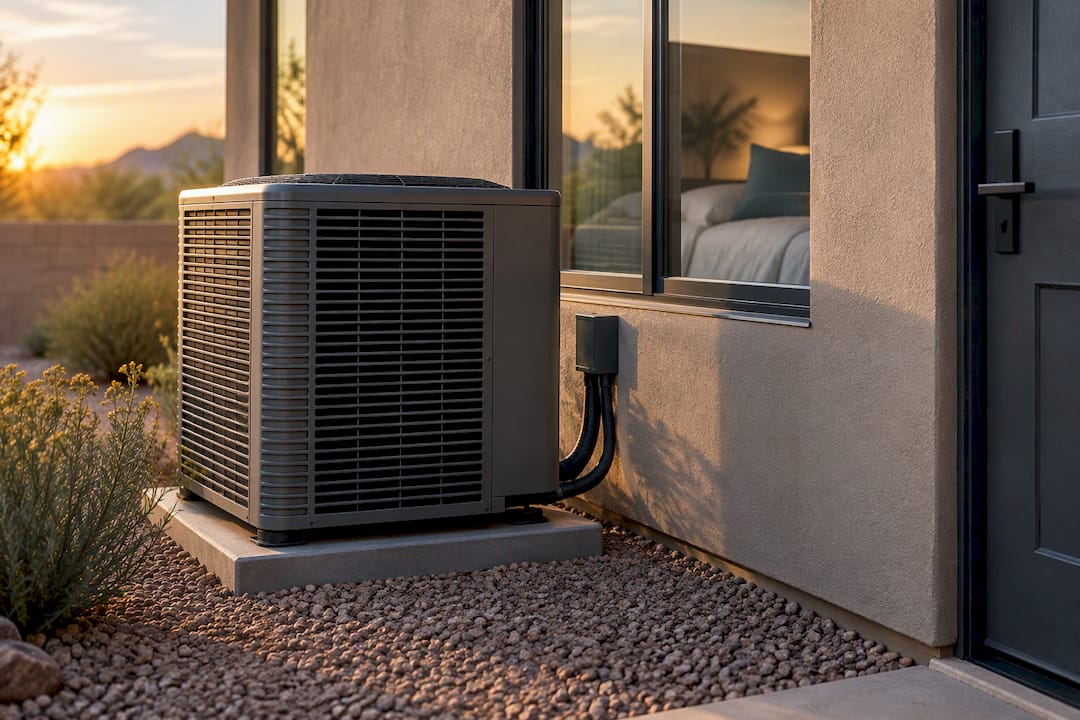
Arizona’s noise challenges are different from what a generic soundproofing guide assumes. Outdoor HVAC and swamp cooler units sit right outside bedroom windows in a lot of Arizona floor plans, and a solid-core exterior door plus sealed window frames on that side of the house cuts the hum noticeably. Desert wildlife, coyotes, owls, and the occasional javelina, contributes more nighttime noise than most homeowners expect, and since that sound arrives as sharp, irregular bursts rather than steady background noise, laminated glass windows help more than mass alone because the interlayer specifically dampens the higher-frequency components of animal calls.
City and traffic noise in growing metro areas like Phoenix and Tucson tends to be lower-frequency and constant, which is exactly the range where mass and decoupling matter most: a mineral wool cavity with resilient channel or isolation clips on a street-facing wall addresses this far better than absorption panels alone. Match your fix to your specific noise source rather than applying the same solution everywhere in the house.
Why acoustic planning belongs in the blueprint, not the punch list
The homeowners who end up happiest with a quiet house are almost never the ones who retrofit their way there. They are the ones who thought about sound before the walls went up. Acoustic detailing and energy detailing use the same tools, sealed penetrations, quality windows, continuous insulation, so planning them together during design costs little extra and avoids the compromises that come with cutting into finished walls later.
Retrofitting after the fact means working around what already exists: a window you cannot easily replace without touching the siding, a wall you cannot fully open without disturbing plumbing or wiring, an HVAC layout you are stuck with. Building it right the first time means none of those constraints apply, and the acoustic gains achieved during construction tend to be larger and cheaper per dollar spent than anything achievable in an existing home.
There is also a resale angle worth considering. A quiet home with lower energy bills is a easier sell than a home with either quality alone, and buyers increasingly notice both. If you are planning a new build or a major renovation, bring up acoustic goals with your builder at the design stage, alongside window selection and insulation choices, rather than treating sound control as an afterthought once the drywall is up. The cost difference between planning for it and retrofitting for it later is rarely close.
— David Kobierski
How Better Quality Builders makes a quiet home the default, not the upgrade
If you are weighing a full retrofit against building new, it is worth knowing that a well-built home can sidestep most of the problems this guide walks through. Better Quality Builders’ AIRLIGHT BUILD approach uses AirLight steel panels to create the kind of airtight, durable envelope that keeps sound out from the first day you move in, without the exposed-wall projects, drywall dust, and phased timelines that come with retrofitting an older house.

That airtightness is also the reason the company points to up to 60% lower energy bills as part of its build approach: the same sealed joints that keep noise out also keep conditioned air in, so you are not choosing between a quiet home and an efficient one. If you are exploring what that looks like for your own lot:
- Browse the AIRLIGHT BUILD floor plan library to see customizable layouts before you commit to anything.
- Request a 3D rendering on your selected lot to see how a design fits your specific site.
- Reach out through the custom home building overview to talk through your goals with the team directly.
Whether you are building in Scottsdale or elsewhere across Arizona, starting the acoustic and energy conversation at the design stage, rather than after move-in, is the most direct path to a home that stays quiet and comfortable for decades.
Sources
- Whole Building Design Guide — Acoustic comfort
- USG — Sound performance selector / guidance
- DOE — Low-E storm windows webinar / case studies
- HardHatCalc — Wall soundproofing calculator
- BuildMat Insight — Sound insulation materials and 2026 cost analysis
FAQ
How much would it cost to soundproof a house?
Costs vary widely by scope: sealing gaps and adding weatherstripping in a single room can run under $200, while a full wall retrofit with mineral wool, resilient channel, and drywall costs roughly $140 to $850 or more per 120-square-foot wall depending on the materials used. Whole-house projects scale up from there based on how many rooms and windows you address.
What is the most effective way to soundproof a house?
Combining mass, damping, decoupling, and absorption works better than any single method alone, since effective soundproofing requires all four principles together. For most homes, that means cavity insulation, decoupled framing like isolation clips or resilient channel, added mass such as mass-loaded vinyl, and sealed perimeters at every joint and penetration.
What is the cheapest way to reduce noise through walls?
Sealing gaps around outlets, baseboards, and window and door frames with acoustical caulk is the lowest-cost fix and often the most overlooked one, since unsealed perimeter joints undermine even well-built wall assemblies. Adding heavy curtains, rugs, and weatherstripping to doors extends this budget-tier approach further without opening any walls.
What absorbs sound in a house?
Soft, porous materials absorb sound inside a room, including mineral wool batts, thick rugs, heavy curtains, and upholstered furniture. Absorption reduces echo and reverberation within a space, but it does not block sound from traveling into or out of that room the way mass and decoupling do.