The main types of custom home upgrades fall into nine categories: structural and building envelope, energy systems, kitchen, bathrooms, interior finishes, smart home and electrical, plumbing and water quality, outdoor and curb appeal, and accessibility and future-proofing. For most buyers, the right priority order is safety and structure first, then envelope and efficiency, then mechanical systems, then kitchen and bathrooms, then finishes and tech, and finally outdoor and lifestyle features.
Three things to lock in before anything else:
- Set rough-in decisions early. Structural, envelope, plumbing, and electrical choices must be finalized before walls close. Changing them later triggers expensive change orders.
- Budget 10–20% of your total build cost for upgrades. On a $400,000 build, that is $40,000–$80,000 to allocate across categories.
- Ask your builder about warranty coverage and lifecycle costs for every major system before you sign off on a selection.
Pro Tip: The single most expensive mistake custom home buyers make is treating upgrades as finish-stage decisions. Most high-value upgrades, especially envelope, electrical, and plumbing, must be chosen at design or rough-in. Miss that window and you are paying for demolition, not just materials.
Table of Contents
- What are the main types of custom home upgrades?
- Structural and envelope upgrades: what should you decide first?
- Which energy systems deliver the biggest savings?
- What kitchen upgrades give you the most value?
- Which interior finishes give you the best return?
- What plumbing upgrades should you include in a new build?
- Which outdoor upgrades deliver the strongest ROI?
- How do accessibility and future-proofing upgrades pay off?
- How much do custom home upgrades cost, and which have the best ROI?
- How do you prioritize upgrades and what should you ask your builder?
- Why AirLight steel SIP panels are a high-value envelope upgrade
- Key Takeaways
- The upgrade decisions that actually define a home
- Build smarter in Arizona with Better Quality Builders
- Useful sources and further reading
What are the main types of custom home upgrades?
Every upgrade you can make to a custom home fits into one of the categories below. The table shows what each covers, when it typically affects your build schedule, and which buyer goals it serves best.
| Category | What it covers | Schedule stage | Best for |
|---|---|---|---|
| Structural / envelope | Panels, framing, insulation, roofing | Design + rough-in | Durability, energy savings |
| Energy systems | HVAC, windows/doors, solar, water heating | Design + rough-in | Energy savings, comfort |
| Kitchen | Layout, cabinetry, countertops, appliances | Design (layout) / finish (surfaces) | Daily use, resale value |
| Bathrooms | Fixtures, tile, shower/tub, ventilation | Rough-in (layout) / finish (surfaces) | Resale value, comfort |
| Interior finishes | Flooring, millwork, wall treatments | Finish stage | Aesthetics, daily enjoyment |
| Smart home / electrical | Wiring, automation, EV charging, AV | Rough-in | Future-proofing, lifestyle |
| Plumbing / water quality | Hot-water systems, filtration, pipe materials | Rough-in | Durability, health, savings |
| Outdoor / curb appeal | Decks, landscaping, garage/front door, paint | Finish / post-build | Resale ROI, lifestyle |
| Accessibility / future-proofing | Wide doorways, zero-step entries, low-maintenance finishes | Design + rough-in | Long-term livability |
A recommended build sequence, supported by industry guidance, runs structural and safety first, then layout and systems, then functional rooms like kitchens and bathrooms, and finally
cosmetic finishes. Following that order reduces rework and keeps change-order costs under control.
Structural and envelope upgrades: what should you decide first?
The building envelope, meaning the walls, roof, and foundation assembly, is the single highest-leverage upgrade category in a custom home. Decisions made here affect energy performance, structural resilience, indoor air quality, and long-term maintenance costs for the life of the structure. They cannot be changed without tearing into finished walls, which is why they belong at the top of your priority list and at the top of your design meeting agenda.
AirLight steel SIP panels and advanced panel systems
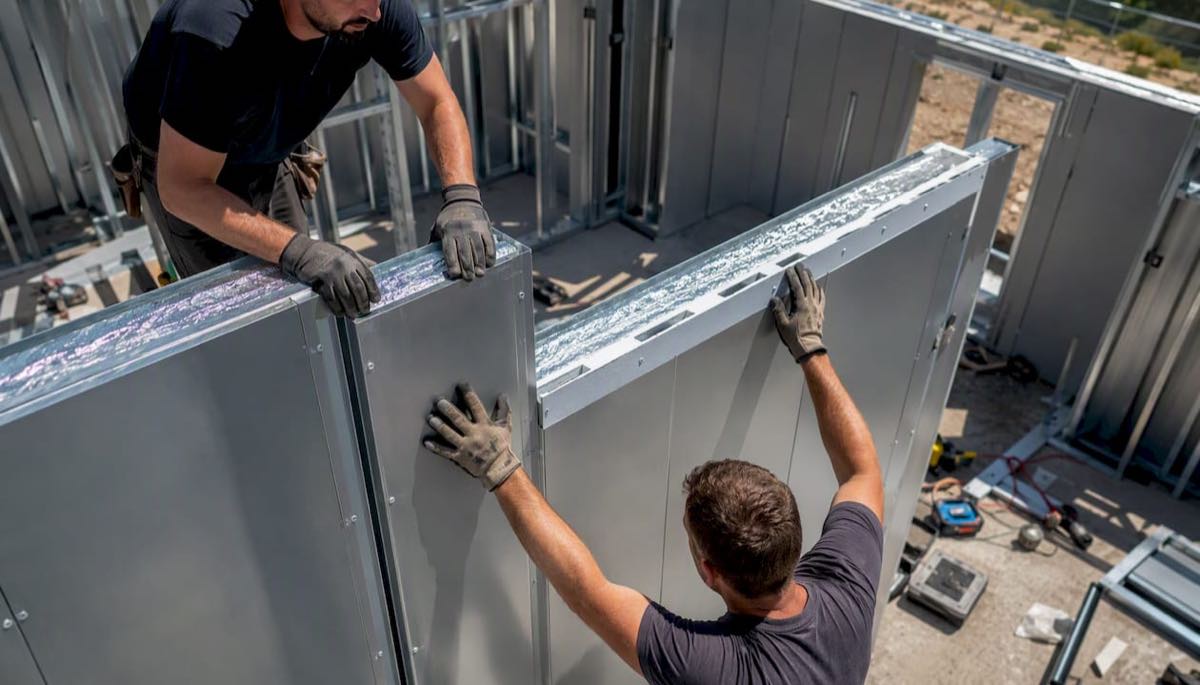
Structural insulated panels (SIPs) replace traditional stud-framed walls with a continuous insulated core bonded between structural skins. AirLight steel SIP panels, the system Better Quality Builders uses, take that concept further by using steel skins rather than OSB, which adds resistance to moisture, pests, fire, and the kind of lateral forces generated by hurricanes and earthquakes. The result is a wall assembly that performs well in extreme climates and delivers significantly lower energy bills compared to conventionally framed homes.
From a schedule standpoint, panel systems often compress the framing and sheathing phase because large prefabricated sections go up faster than stick framing. That speed advantage can offset some of the material cost premium and reduce weather exposure during construction.
Pro Tip: When evaluating any panel or insulation system, ask for the assembly’s whole-wall R-value, not just the nominal insulation R-value. Thermal bridging through studs in a conventionally framed wall can reduce effective R-value by 20–30% compared to the insulation’s rated performance.
Quality cues to verify before committing to an envelope system: confirmed U-value or R-value for the full assembly, third-party testing documentation, manufacturer warranty on panels and connections, and the installer’s certification or training from the panel manufacturer.
Cost bands for major envelope upgrades
Upgraded insulation packages (spray foam, closed-cell, or SIP systems) typically add cost over standard batt insulation, with the premium varying by system type and home size. Premium roofing materials such as metal standing seam or impact-rated tile carry higher upfront costs than standard asphalt shingles but offer significantly longer lifespans compared to standard shingles. Structural changes like elevation packages or reinforced foundations are site-specific and should be priced through your builder’s structural engineer. Understanding how energy savings offset build costs is key to evaluating these investments accurately.
Which energy systems deliver the biggest savings?
Mechanical and energy systems are where long-term operating costs are won or lost. The right combination of HVAC, windows, doors, solar, and water heating can cut monthly utility bills substantially while improving comfort year-round.
HVAC and climate control
Heat pumps have become the default high-efficiency choice for new custom builds in most U.S. climates. A modern variable-speed heat pump handles both heating and cooling from a single system, and when paired with a zoned distribution setup, it lets you condition only the spaces in use. High-efficiency gas furnaces remain competitive in colder climates where heating loads dominate, but in Arizona and similar Sun Belt markets, an all-electric heat pump with a high SEER2 rating is usually the more cost-effective long-term choice.
Zoned HVAC requires additional ductwork or a mini-split configuration and must be planned at rough-in. Adding zones after drywall is expensive. Smart climate control integration, including programmable and AI-driven thermostats like Ecobee or Nest, layers on top of the mechanical system and can be added at finish stage, though pre-wiring for sensors at rough-in saves time and cost.
Windows, doors, and solar
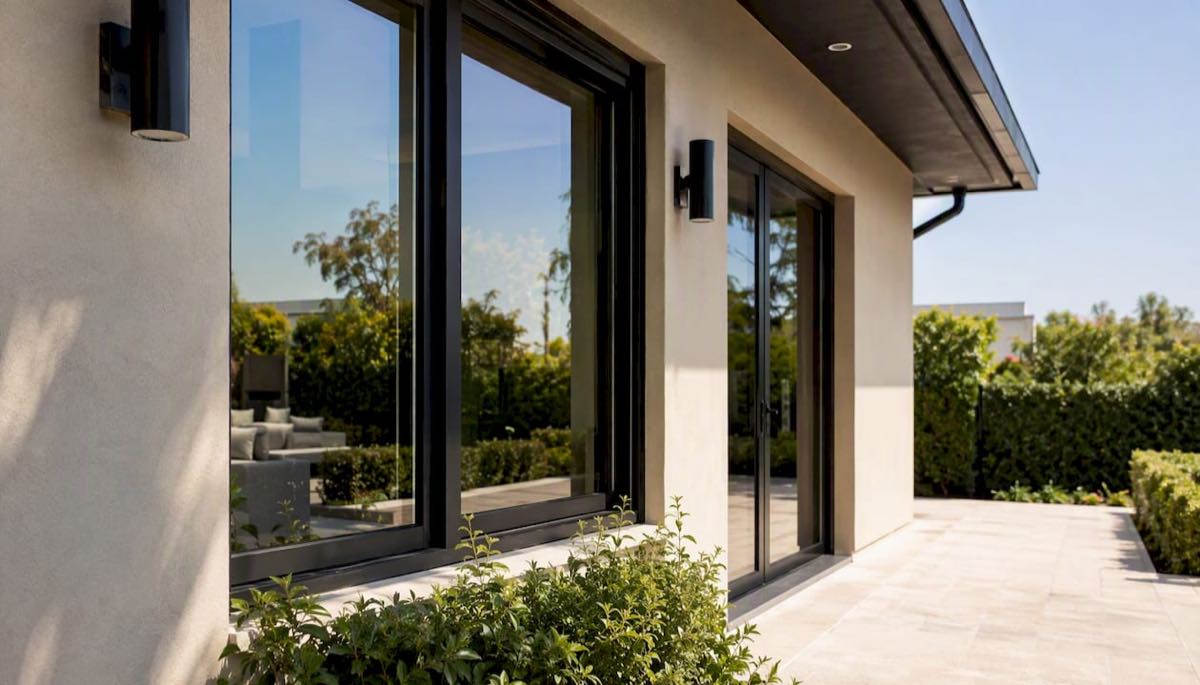
Window and door upgrades affect both energy performance and resale value. Double-pane low-E glass is the baseline for most new builds; triple-pane or fiberglass-framed units improve performance further in extreme climates. For Arizona builds, solar heat gain coefficient (SHGC) matters as much as U-factor: a low SHGC rating reduces cooling loads significantly.
Solar PV makes financial sense on most new Arizona builds given the state’s solar resource and available federal tax credits. A typical residential solar system sized for a new custom home can involve a substantial upfront cost before incentives, with federal tax credits reducing that amount. Battery storage adds resilience but also adds cost; evaluate it based on your utility’s net metering policy and your tolerance for grid outages.
A practical checklist for evaluating energy-system upgrades:
- Confirm ENERGY STAR certification or equivalent for HVAC, windows, and appliances
- Request projected annual kWh savings from your builder or HVAC contractor
- Ask for a simple payback estimate (upfront cost divided by annual savings)
- Verify that solar system sizing accounts for your home’s projected load, including EV charging
- Check that all systems integrate with your planned smart-home platform
What kitchen upgrades give you the most value?
Kitchen upgrades span a wide range of investment levels, and the right tier depends on how you cook, how long you plan to stay, and what your resale market rewards. Custom kitchen designs generally fall into three tiers.
Surface refresh tier
Countertop replacement, hardware swaps, and cabinet refacing fall here. These changes improve the look of an existing layout without touching plumbing or electrical. For a new build, this tier is less relevant since you are selecting from scratch, but it sets the baseline: budget-conscious buyers can achieve a polished result with stock or semi-custom cabinets, quartz countertops, and quality hardware without a full custom package.
Semi-custom tier
This is where most custom home buyers land. Semi-custom cabinetry from manufacturers like Home Decorators Collection offers near-custom results at moderate cost, with options like soft-close hinges, plywood box construction, and a wide range of door styles and finishes. Paired with a mid-tier appliance package (think 36-inch range, panel-ready refrigerator, built-in microwave), this tier delivers strong daily-use value and good resale performance.
Remodeling Magazine’s Cost vs. Value data shows minor kitchen remodels in the $15,000–$25,000 range returning 75–85% at resale, making this one of the strongest ROI categories in the home.
Pro Tip: Use a 3D kitchen design tool like Cabinets.com’s Create-a-Kitchen to visualize your cabinet layout and finish selections before finalizing your builder’s allowance. Changing cabinet configurations after rough-in means moving plumbing and electrical, which adds cost fast.
Full custom tier
Layout changes, high-end appliances (Sub-Zero, Wolf, Miele), custom millwork islands, and specialty storage systems live here. These choices must be locked in at design stage because they drive plumbing rough-in locations, ventilation requirements, and structural considerations for large islands. The cost premium is real, but for buyers who cook frequently or entertain regularly, the daily-use return is hard to replicate with a lower-tier selection.
Which interior finishes give you the best return?
Interior finishes are the most visible part of your home and the category where personal taste matters most. They are also where buyers most often overspend on items that add cost without adding proportional value, or underspend on high-traffic surfaces that wear out quickly.
Flooring
Hardwood flooring remains the gold standard for perceived value and resale appeal, with solid hardwood running higher in cost than engineered hardwood but offering more refinishing cycles over its life. Luxury vinyl plank (LVP) has closed the gap significantly in both appearance and durability, and it handles moisture better than hardwood, making it a practical choice for kitchens, bathrooms, and Arizona homes where temperature swings can cause solid wood to move. Tile is the most durable option for wet areas and high-traffic zones, with porcelain outperforming ceramic in scratch and moisture resistance.
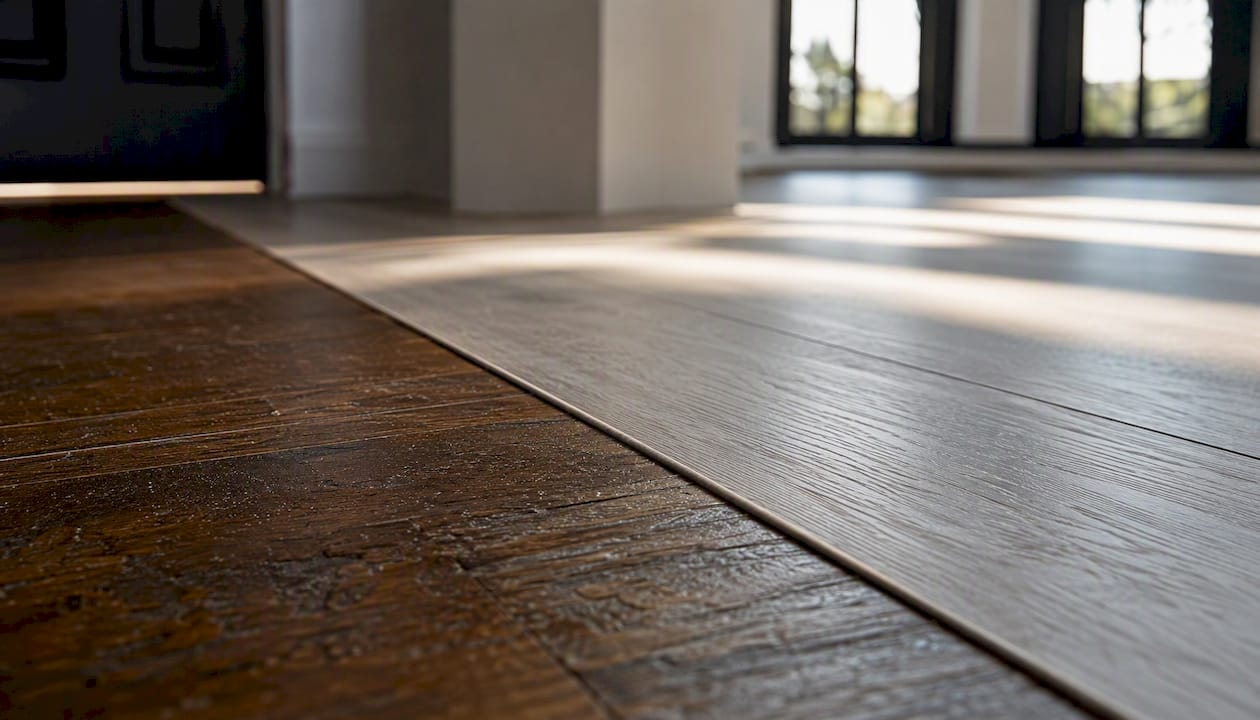
Pro Tip: Spend more on flooring in the rooms you use most: the main living area, kitchen, and primary bedroom. In guest rooms and secondary spaces, a well-chosen LVP or carpet can free up budget for the areas that matter.
Millwork and built-ins
Custom millwork, including built-in shelving, coffered ceilings, wainscoting, and trim packages, adds architectural character that is difficult to replicate with furniture. The cost-benefit case is strongest when millwork is integrated into the design early and built by the same crew doing finish carpentry, rather than added as a retrofit. Stock millwork from a home center can approximate the look at lower cost, but the fit and finish gap is noticeable in high-visibility spaces.
Surface choices and small high-impact swaps
Countertops, backsplash tile, and cabinet hardware are the finish-stage choices that most influence how a kitchen or bathroom reads visually. Quartz countertops offer durability and low maintenance at a competitive price point. Marble and quartzite add luxury appeal but require sealing and more careful maintenance. For backsplash, a simple large-format tile in a neutral color tends to age better than trend-driven patterns, though 2026 design trends favor textured minimalism, which translates well to handmade-look tile or fluted surfaces.
Small swaps with outsized visual impact: upgraded door hardware throughout the home, a statement light fixture in the entry or dining room, and a well-chosen paint color. These often cost under $1,000 combined and change how the entire home feels.
What plumbing upgrades should you include in a new build?
Plumbing upgrades divide cleanly into rough-in decisions (pipe material, drain locations, hot-water system type) and finish-stage decisions (fixtures, faucets, showerheads). The rough-in choices have the longest-lasting impact and the highest retrofit cost if you change your mind later.
Hot-water systems
Tankless water heaters deliver hot water on demand and eliminate standby heat loss, making them more energy-efficient than standard tank units. A whole-home tankless unit sized for your home’s peak demand typically costs more upfront than a tank heater but lasts longer and reduces monthly energy costs. Heat-pump water heaters are an increasingly popular alternative: they use electricity to move heat rather than generate it, achieving efficiency levels two to three times higher than a standard electric resistance heater. For Arizona builds with high cooling loads, a heat-pump water heater installed in a conditioned space also contributes a small cooling effect to that space.
High-efficiency tank water heaters remain a cost-effective middle ground, particularly for homes with lower hot-water demand or where gas is the primary fuel.
Water filtration and pipe materials
Whole-house water filtration and softening systems are worth considering in regions with hard water, including much of Arizona. Hard water accelerates scale buildup in water heaters, dishwashers, and fixtures, shortening their service life. A whole-house softener and a point-of-use reverse osmosis system at the kitchen sink address both scale and drinking water quality. Both require rough-in provisions (a bypass loop for the softener, a dedicated drain line for the RO system).
PEX tubing has largely replaced copper in new residential construction for supply lines. It is flexible, freeze-resistant, faster to install, and less expensive than copper. Copper remains the preferred choice for some applications and carries a longer track record, but PEX’s performance in residential supply systems is well established. Drain lines are typically ABS or PVC; both are durable and low-maintenance.
Plumbing upgrades that must be decided at rough-in: hot-water system type and location, recirculation loop for instant hot water at distant fixtures, water softener bypass, and any specialty fixtures (pot filler, outdoor shower, steam generator) that require dedicated supply lines.
Which outdoor upgrades deliver the strongest ROI?
Outdoor and curb-appeal upgrades split into two groups: high-ROI, relatively low-cost improvements that pay back well at resale, and lifestyle-driven additions that add enjoyment but may not fully recoup their cost.
High-ROI exterior upgrades worth prioritizing:
- Exterior paint: One of the highest-returning upgrades available, with costs typically in the $3,000–$6,000 range and ROI exceeding 100% according to Remodeling Magazine’s Cost vs. Value data. For a new build, this means selecting a quality exterior paint system rather than the builder’s standard offering.
Outdoor living upgrades like covered patios, decks, and outdoor kitchens add genuine lifestyle value, particularly in Arizona where outdoor living is practical for much of the year. A covered patio or ramada adds usable square footage at a fraction of interior construction cost. Outdoor kitchens and fire features are primarily lifestyle investments; their resale return varies by neighborhood and buyer pool.
Practical maintenance questions for exterior systems: What is the warranty on the roofing material and installation? Does the exterior cladding require periodic painting or sealing? What is the expected lifespan of the deck or patio surface material? For Arizona-specific material considerations, the guide to choosing exterior materials covers climate-appropriate choices in detail.
How do accessibility and future-proofing upgrades pay off?
Future-proofing upgrades are among the most cost-effective investments you can make in a new build, because adding them during construction costs a fraction of what a retrofit requires. A wider doorway (36 inches instead of 32) costs almost nothing extra when framed from scratch. Adding blocking in bathroom walls for future grab bars costs under $100 in materials. A zero-step entry requires grading and threshold planning at design stage but adds no meaningful cost to a new build.
Common future-proofing items to include at design stage:
- 36-inch clear-width doorways throughout the main floor
- Zero-step entry at the primary entrance and garage access
- Blocking in all bathroom walls for future grab bar installation
- Low-threshold or curbless shower in at least one bathroom
- Wider hallways (42 inches minimum) on the main floor
- Lever-style door hardware instead of round knobs
Durability upgrades reduce long-term maintenance costs and extend the intervals between major replacements. Low-maintenance exterior cladding (fiber cement, stucco, or steel panels) avoids the repainting and rot-repair cycles associated with wood siding. Hard-wearing flooring choices (porcelain tile, LVP with a thick wear layer) in high-traffic areas reduce replacement frequency. Long-life mechanical choices, including heat pumps with strong warranty coverage and tankless water heaters, reduce the likelihood of a major system replacement within the first 15–20 years.
Accessibility upgrades also affect resale marketability. As the U.S. population ages, homes that accommodate aging in place attract a broader buyer pool. The guide to building a low-maintenance custom home covers durability-focused selections in more detail.
How much do custom home upgrades cost, and which have the best ROI?
The standard rule of thumb is to budget a moderate portion of your total build cost for upgrades above the builder’s base specification, spread across categories. How you allocate that budget determines both your daily experience and your resale position.
| Upgrade type | Typical cost range | Estimated ROI / resale impact | Best for | When to decide |
|---|---|---|---|---|
| Exterior paint (premium system) | $3,000–$6,000 | 100%+ | Curb appeal, resale | Finish stage |
| Garage door (premium) | $2,000–$4,000 | 90–95% ROI | Curb appeal, security | Finish stage |
| Minor kitchen upgrade | $15,000–$25,000 | 75–85% | Daily use, resale | Design / finish |
| Bathroom upgrade | $10,000–$20,000 | 70–75% | Daily use, resale | Rough-in / finish |
| Landscaping package | $3,000–$15,000 | 80–100% | Curb appeal, lifestyle | Post-build |
| Energy envelope (SIP / spray foam) | Varies by system | Long-term savings | Energy, durability | Design / rough-in |
| Solar PV system | $15,000 (before incentives) | Varies by market | Energy savings | Design / rough-in |
| Smart home rough-in | Low incremental cost | Future-proofing | Lifestyle, resale | Rough-in |
| Accessibility rough-in | Minimal at new build | Marketability | Long-term livability | Design |
ROI figures above are drawn from Remodeling Magazine’s Cost vs. Value benchmarks. For federal financing programs and buyer assistance resources relevant to new construction, HUD’s portal is the authoritative starting point.
A practical budgeting checklist:
- Set a contingency of 10–15% of your upgrade budget for change orders and selections that run over allowance
- Sequence your spending: envelope and systems first, then kitchen and bathrooms, then finishes
- Ask your builder how allowances work and what happens when you exceed them
- Explore construction-to-permanent financing options that roll land, build, and upgrade costs into one loan
- Lock finish selections as early as possible to avoid change-order fees and schedule delays
Understanding how construction bids work helps you read allowances accurately and avoid surprises when upgrade selections exceed the base bid.
How do you prioritize upgrades and what should you ask your builder?
A clear framework prevents upgrade decisions from becoming overwhelming. Start with the categories that affect structural integrity and long-term performance, then work outward to daily-use spaces, and finish with cosmetic selections.
Priority framework:
- Safety and structure (envelope, foundation, roofing)
- Envelope and efficiency (insulation, windows, doors, panel system)
- Mechanical systems (HVAC, plumbing, electrical rough-in)
- Daily-use spaces (kitchen, primary bathroom)
- Secondary spaces and finishes (secondary bathrooms, flooring, millwork)
- Cosmetic and lifestyle (outdoor living, smart gadgets, luxury features)
Financial and timeline factors to weigh for each upgrade: estimated payback period, maintenance requirements and annual cost, warranty coverage and who backs it, impact on build schedule (does it add lead time?), and whether it affects other systems (an oversized solar array may require a panel upgrade).
Questions to ask your builder at every selection meeting:
- What is the warranty on this product, and who honors it: the manufacturer or you?
- Who installs this system, and are they certified by the manufacturer?
- What is your change order policy if I modify this selection after rough-in?
- What is the lead time, and does it affect my completion date?
- Can you provide the R-value, SEER rating, or other performance specification in writing?
- What maintenance does this system require, and what does it cost annually?
Red flags: A builder who cannot provide written specifications, deflects warranty questions, or gives vague answers about who installs specialty systems (solar, automation, SIP panels) is worth pressing harder. Vague answers at selection time become expensive disputes at completion.
Pro Tip: Bring a printed copy of the custom home building checklist to every builder meeting. Checking off decisions as you make them prevents the common problem of arriving at rough-in with unresolved selections.
Why AirLight steel SIP panels are a high-value envelope upgrade
AirLight steel SIP panels represent a meaningful step up from both conventional stick framing and standard OSB-skinned SIPs. The steel skins provide structural rigidity and resistance to the forces that damage conventional framing in high-wind and seismic events, which is why the same panel technology is specified in hurricane and earthquake zones worldwide. For Arizona buyers, the thermal performance is equally relevant: the continuous insulated core eliminates the thermal bridging that reduces effective R-value in stud-framed walls, and the airtight assembly reduces the infiltration losses that drive up cooling costs in hot climates.
Better Quality Builders builds every home with AirLight panels as the standard envelope system, not an optional upgrade. That means the energy performance, durability, and weather resistance are built into the structure from day one rather than added as a finish-stage option.
Practical selection questions to ask about any SIP or advanced panel system:
- What is the whole-wall R-value of the assembly, including the panel connections?
- What is the manufacturer’s warranty on the panels, and what does it cover?
- Has the system been tested to a recognized wind or impact standard?
- How does the panel system affect the rough-in schedule compared to stick framing?
- Can the builder provide energy modeling results showing projected heating and cooling loads?
From a schedule standpoint, prefabricated panel systems typically reduce framing time compared to stick construction, which can compress the overall build timeline. That schedule advantage has real value: fewer days of weather exposure during construction and an earlier move-in date.
Key Takeaways
The highest-value types of custom home upgrades combine early structural decisions with energy-efficient systems and targeted kitchen, bathroom, and curb-appeal investments that deliver both daily enjoyment and measurable resale returns.
| Point | Details |
|---|---|
| Prioritize envelope first | Structural and insulation upgrades must be decided at design or rough-in; retrofitting them later costs significantly more. |
| Budget 10–20% for upgrades | On a $400,000 build, that is $40,000–$80,000 to allocate across categories, with envelope and systems taking priority. |
| Top ROI upgrades | Exterior paint ($3,000–$6,000, 100%+ ROI), garage door ($2,000–$4,000, 90–95% ROI), minor kitchen ($15,000–$25,000, 75–85% ROI), and bathroom upgrades ($10,000–$20,000, 70–75% ROI) lead on resale return. |
| Lock rough-in decisions early | Plumbing, electrical, and smart-home wiring must be finalized before walls close to avoid costly change orders. |
| Better Quality Builders | Builds with AirLight steel SIP panels as the standard envelope system, delivering up to 60% lower energy bills and a structure designed to last centuries. |
The upgrade decisions that actually define a home
Most buyers spend the most time choosing countertops and the least time thinking about their wall assembly. That is understandable: countertops are visible and tactile, while insulation is invisible once the walls close. But the envelope is the decision that determines your energy bills, your indoor air quality, and how your home performs in a severe weather event for the next 50 years. A beautiful kitchen in a poorly insulated house is a daily reminder of a decision you cannot easily undo.
The other pattern worth noting: buyers who treat smart-home upgrades as a finish-stage add-on consistently end up with a collection of standalone devices rather than an integrated system. The 2026 shift toward invisible intelligence, where technology disappears into the architecture, only works if the conduit, wiring, and hub locations are planned at rough-in. A smart home that requires visible adapters, surface-mounted wiring, and workarounds is not what anyone pictured when they started the build.
The practical takeaway is that the most satisfying custom homes are built by buyers who made the unsexy decisions first: the wall system, the mechanical rough-in, the electrical panel capacity. The finishes and fixtures are the reward for getting the structure right.
Build smarter in Arizona with Better Quality Builders
If you are planning a custom home in Arizona, particularly in Maricopa County, the upgrade decisions covered in this guide are exactly what Better Quality Builders is built to help you navigate. Every home starts with AirLight steel SIP panels as the standard envelope, which means the energy performance and structural durability are not optional line items. You get up to 60% lower energy bills and a home built to withstand the conditions that damage conventional construction.
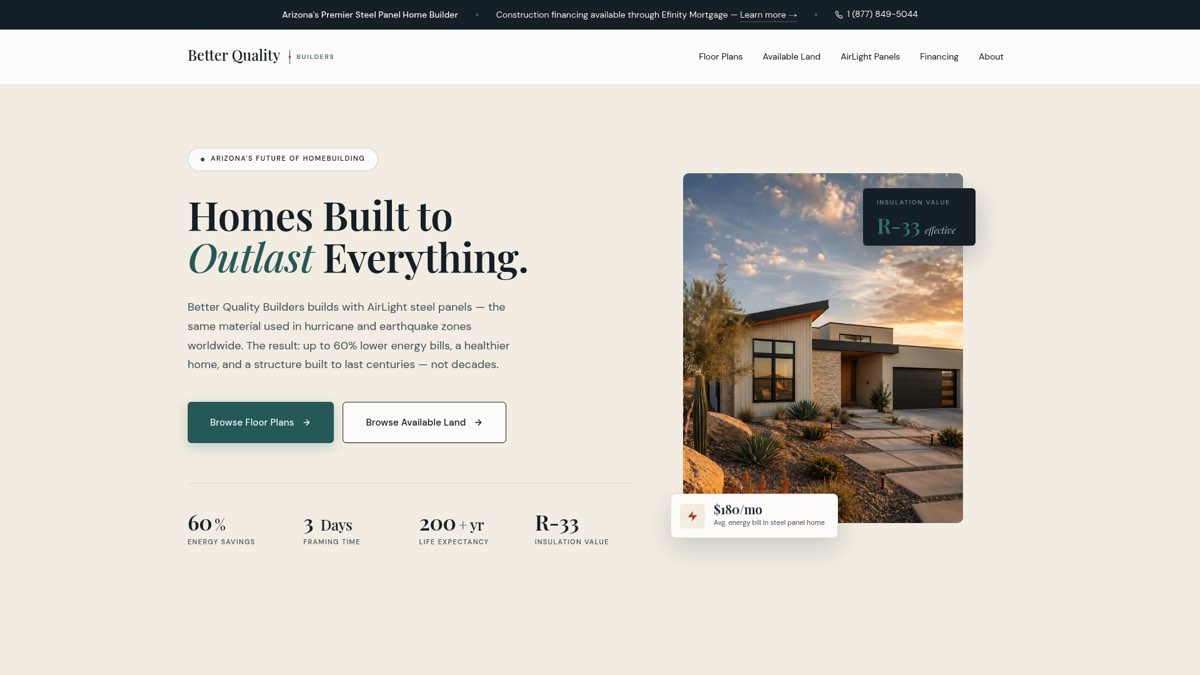
From there, the process is designed to reduce decision friction: a large library of customizable floor plans, real-time lot inventory so you can see what is buildable now, 3D preview renderings of your home on a specific lot before you commit, and combined construction and land financing with as little as 10% down. You are not piecing together a build from scratch; you are selecting and customizing within a system that has already solved the hard problems.
To see available floor plans, view lot inventory, or request a 3D preview of your future home, visit Better Quality Builders or explore the AirLight panel system in detail. The next step is a conversation, not a commitment.
Useful sources and further reading
The sources below were used for cost benchmarks, ROI data, trend context, and design guidance throughout this article.
- Home renovation ideas: 15 upgrades worth the money in 2026 | Remodel AI
- portal.hud.gov
- Create-a-Kitchen by Cabinets.com
- 40 Of The Best Home Renovation Ideas For 2026 | Divine Home & Office
- 15 Home Renovation Ideas (June 2026) Transform Your Space on Any Budget
For deeper guidance on the custom build process, the step-by-step custom home build guide and the role of an architect in your custom build cover the decisions that shape upgrade feasibility from the ground up.